Guide · 20 min read
Ship Your First Prisma App to Production — Composer, Postgres, and Compute in 20 Minutes
The production baseline for any Prisma app: scaffold a TypeScript API with Prisma ORM 8, model data with a contract, run it locally on Prisma Postgres, and deploy to Prisma Compute with one command. No UI and no product features on purpose — you finish with a live API and the workflow to build on. Every step tested on the Free plan.
Table of contents
Prisma is a complete TypeScript stack: you declare your app (services, databases, connections) in TypeScript, model your data with Prisma ORM, and deploy everything to Prisma Compute with one command. The Free plan includes 200,000 database operations, 2GB storage, 50 databases, 1M compute requests, and 360 GB-hours of memory — no credit card, no time limit, no usage billing.
In this guide, you'll scaffold a TypeScript API on Prisma Postgres, understand the Composer declaration, model data with Prisma ORM, run it locally with seeded data, test the API, and deploy it to Prisma Compute.
What you'll build: a Hono API with two routes (/ and /users) on a Prisma Postgres database, running locally and deployed to Prisma Compute.
Time: ~20 minutes | Cost: Free (no credit card required)
Scope — what this guide is, and what it isn't
This is the production baseline, not a finished product. There is no UI, no authentication, and no CRUD beyond reading the three seeded users. That is deliberate: the goal is to remove every unknown between an empty folder and a live, type-safe API — Bun, the local emulators, contracts, migrations, CLI auth, and the deploy workflow.
Once these steps are done, building your own models, mutations, and a frontend on top is ordinary application work, with no setup friction left. If you want a features-complete app, treat this as step zero.
How to run the commands in this guide
- Every command runs in a terminal, from the project root (
my-app/) unless the step says otherwise. $marks the shell prompt — type only what follows it.- The scaffold already installed the dependencies, so there is no
npm installstep. - Steps 4 and 5 need two terminals: the first runs the dev server and stays busy; the second runs
curl. - macOS and Linux use bash/zsh. On Windows the CLI steps work in PowerShell, but
prisma dev(local development) does not support Windows yet.
Prerequisites
- Node.js 22.18+ or 24.11+ or 26+ (24 recommended) —
node --version - npm (ships with Node.js)
- Bun — required for local dev (
curl -fsSL https://bun.sh/install | bash) - A Prisma account — free to create at console.prisma.io, no credit card needed for the Free plan
Verify your setup:
node --version   # v22.18+ or v24.11+ or v26+
npm --version    # 10+
bun --version    # 1.x
Step 1 — Scaffold the App
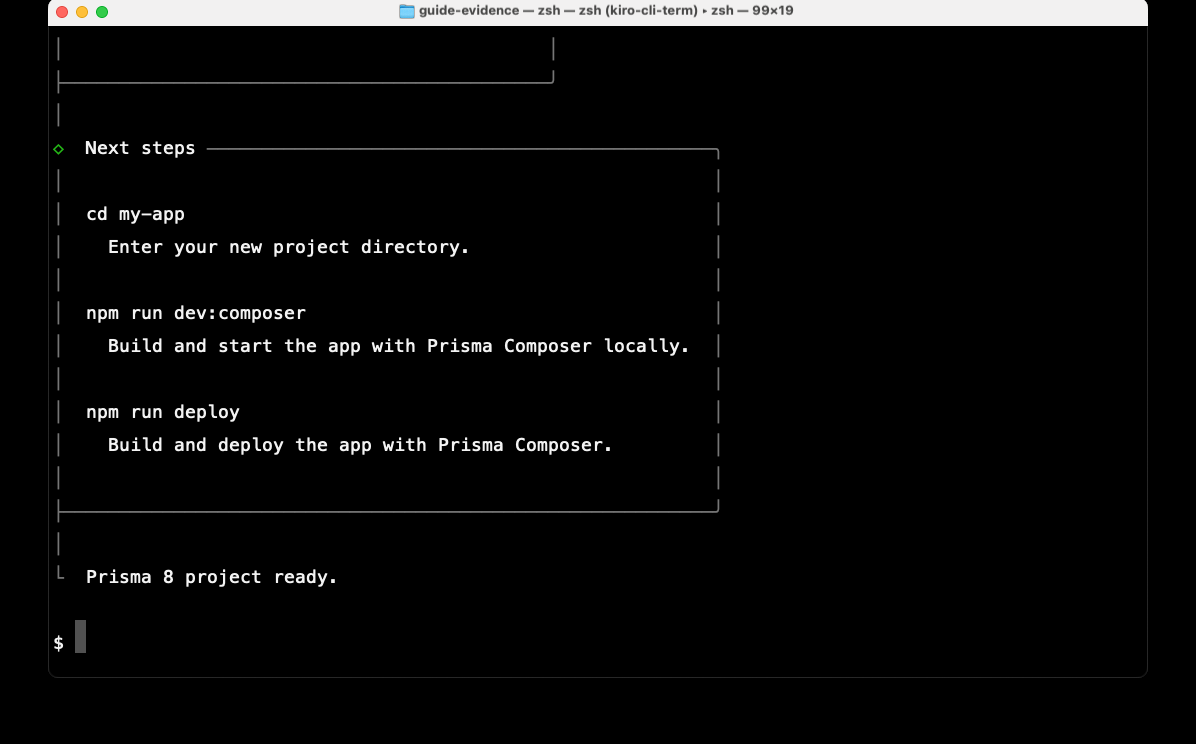
Run this in the directory where you want the project folder to live (for example your ~/Code folder). It creates my-app/, installs every dependency with npm, authors a baseline migration, and initializes a Git repository — this takes a couple of minutes and needs network access.
npx --yes create-prisma@latest my-app --template hono --provider postgres --no-deploy --package-manager npm --authoring psl --skills none --yes
cd my-app
This guide was re-tested with create-prisma 0.14.6 and Prisma CLI 8.0.0-rc.28. @latest can move; the commands below reflect that release.
The flags:
--template hono— uses Hono as the web framework (small, fast API server)--provider postgres— Prisma Postgres database--no-deploy— scaffold only, don't deploy yet--authoring psl— Prisma Schema Language for data modeling--skills none— skip agent skill files--yes— accept defaults, no prompts
What gets created:
my-app/
├── module.ts                 # App declaration (Composer)
├── service.ts                # Service declaration
├── prisma.config.ts          # Prisma config (ORM + Composer + deploy)
├── tsdown.config.ts          # Build config (bundles src/index.ts → dist/server.mjs)
├── migrations/
│   ├── app/<timestamp>_init/ # migration.json, migration.ts, ops.json
│   └── snapshots/            # contract.json and contract.d.ts per snapshot
└── src/
    ├── index.ts              # Hono server with / and /users routes
    └── prisma/
        ├── contract.prisma   # Data model (User + Post)
        ├── contract.json     # Emitted contract (generated)
        ├── contract.d.ts     # Contract types (generated)
        ├── composer.ts       # Typed data contract for Composer
        ├── db.ts             # Prisma Postgres client from the contract
        ├── users.ts          # listUsers() query helper
        └── seed.ts           # Seeds alice, bob, carol on first query
In this walkthrough the baseline folder is migrations/app/20261030T1854_init/; the timestamp is generated when you scaffold, so use your own _init folder later.
Step 2 — Understand the Composer Declaration
The app is declared in two files. Start with the declaration — it's what every later command operates on.
module.ts — the app
import { module } from "@prisma/composer";
import { postgres } from "@prisma/composer-prisma-cloud/orm";

import { appContract } from "./src/prisma/composer.ts";
import app from "./service.ts";

export default module("my-app", ({ provision }) => {
  const database = provision(
    postgres({
      name: "database",
      contract: appContract,
      config: "./prisma.config.ts",
    }),
    { id: "database" },
  );

  provision(app, { deps: { database } });
});
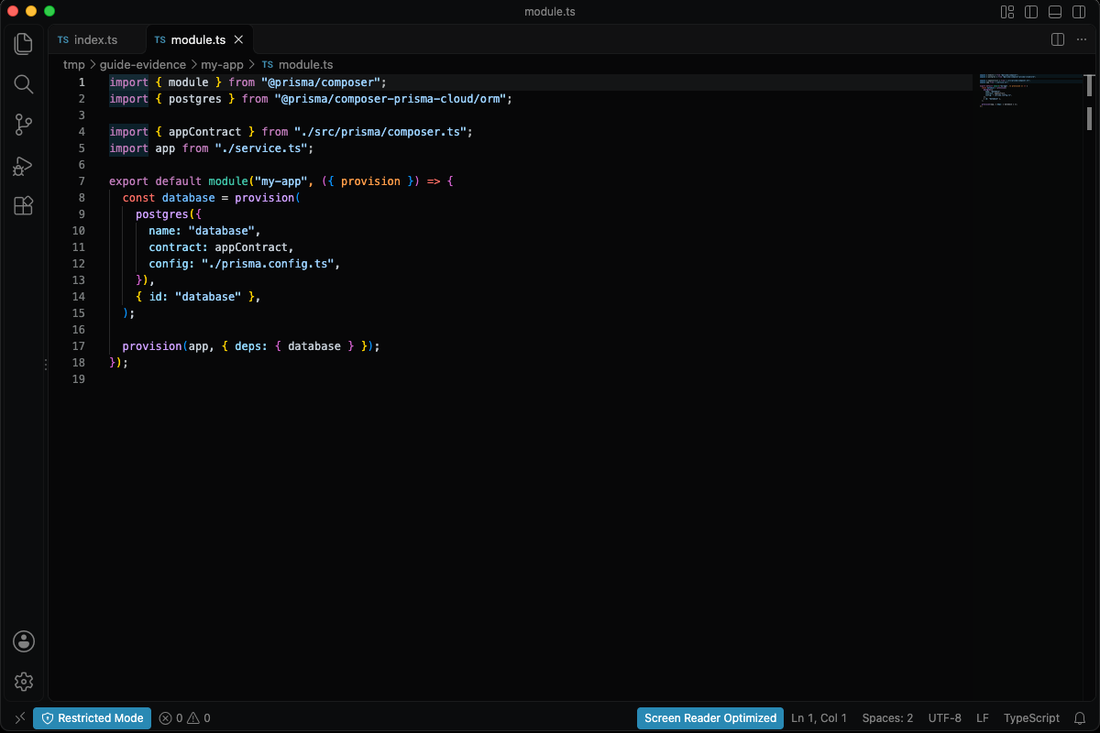
This declares:
- A Prisma Postgres database named "database"
- A service (the Hono app) that depends on the database
- The database is typed by your contract (schema)
service.ts — the service
import node from "@prisma/composer/node";
import { compute } from "@prisma/composer-prisma-cloud";
import { postgres } from "@prisma/composer-prisma-cloud/orm";

import { appContract } from "./src/prisma/composer.ts";

export default compute({
  name: "app",
  deps: {
    database: postgres(appContract),
  },
  build: node({ module: import.meta.url, entry: "./dist/server.mjs" }),
});
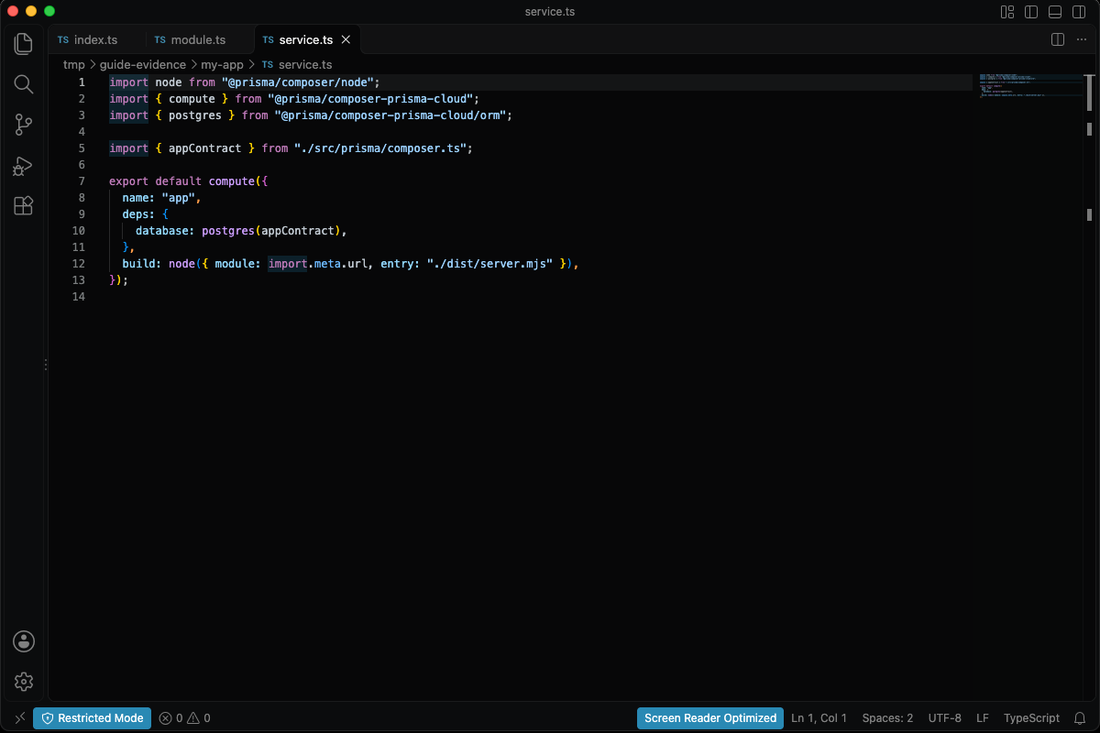
This declares:
- A compute service named "app"
- Its dependency on the database (typed by contract)
- How to build it (Node.js, entry point
dist/server.mjs)
prisma.config.ts — Prisma config
import { definePrismaConfig } from "prisma/config";
import { defineConfig as ormConfig } from "@prisma/orm-postgres/config";
import { defineConfig as composer } from "@prisma/composer/config";
import { nodeBuild } from "@prisma/composer/node/control";
import { prismaCloud, prismaState } from "@prisma/composer-prisma-cloud/control";

export default definePrismaConfig({
  skills: {
    agents: [],
  },
  orm: ormConfig({
    contract: "./src/prisma/contract.prisma",
    db: {
      connection: process.env.DATABASE_URL!,
    },
  }),
  composer: composer({
    entry: "./module.ts",
    extensions: [prismaCloud({ region: "us-east-1" }), nodeBuild()],
    state: prismaState(),
  }),
});
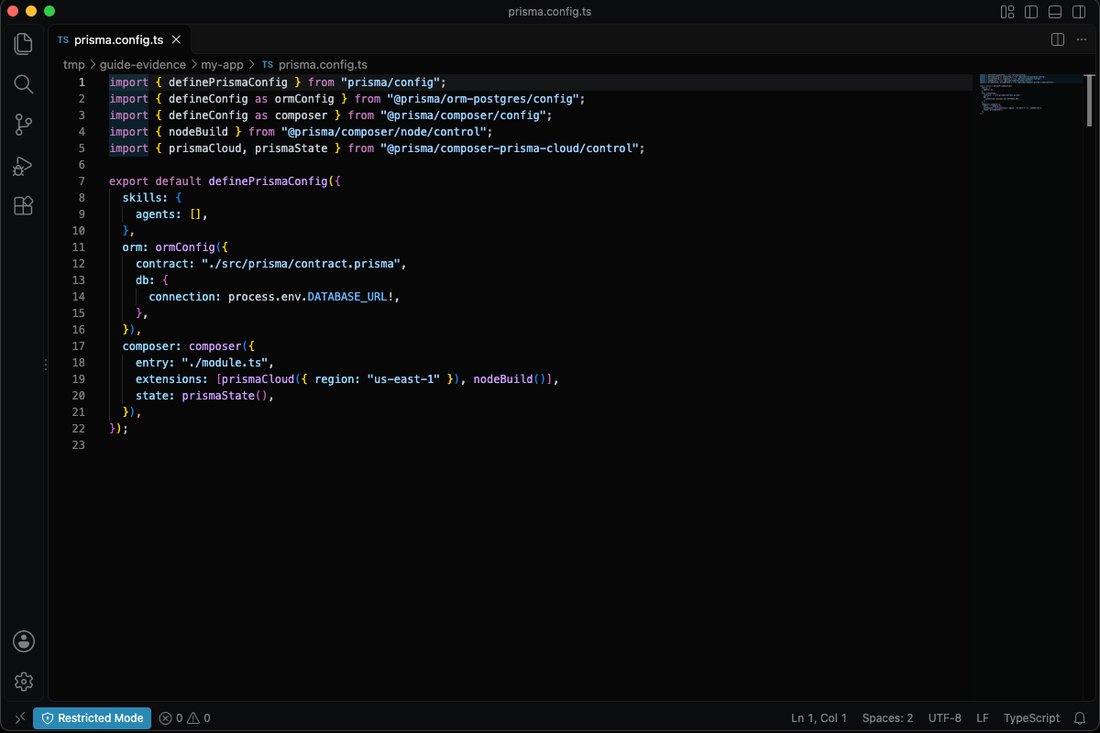
Key points:
orm.contract— points to your Prisma schema fileorm.db.connection— DATABASE_URL (used only by ORM commands likedb:*, not byprisma devorprisma deploy)composer.entry— points atmodule.ts;prisma devandprisma deployread the entry from herecomposer.extensions— deploys to Prisma Cloud inus-east-1regioncomposer.state— keeps deploy state
No connection string in the declaration. The database is a declared dependency. Composer injects the connection wherever the app runs. The declaration is ordinary TypeScript — npx tsc --noEmit checks the wiring.
Step 3 — The Prisma ORM Data Model
The data side lives under src/prisma/. Your schema is the starter contract, and the scaffold emits a typed client plus a seeded query helper from it.
src/prisma/contract.prisma
// use prisma-8

model User {
  id        Int      @id @default(autoincrement())
  email     String   @unique
  username  String?
  name      String?
  posts     Post[]
  createdAt TimestamptzString @default(now())
  updatedAt temporal.updatedAtString()
}

model Post {
  id        Int      @id @default(autoincrement())
  title     String
  content   String?
  author    User     @relation(fields: [authorId], references: [id])
  authorId  Int
  createdAt TimestamptzString @default(now())
  updatedAt temporal.updatedAtString()
}
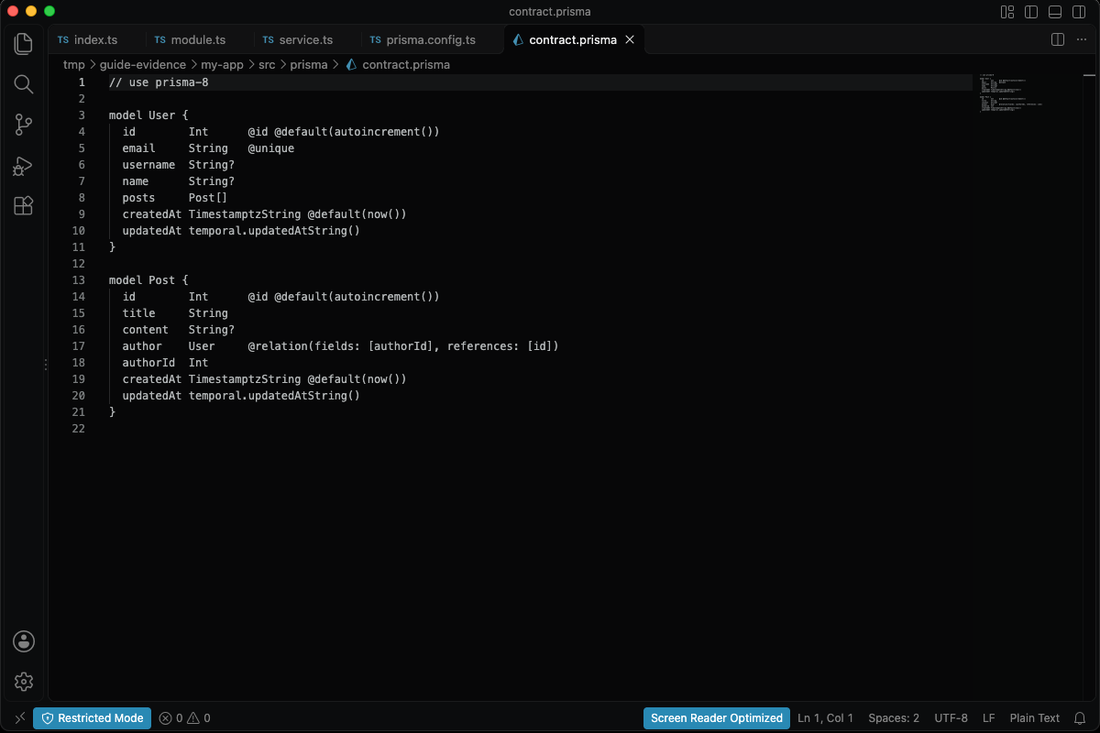
npm run contract:emit compiles this into contract.json and contract.d.ts — the artifacts your queries are type-checked against. The scaffold already ran it once; re-run it from the project root whenever you edit the contract.
src/prisma/composer.ts — typed contract for Composer
import { dataContract } from "@prisma/composer-prisma-cloud/orm";

import type { Contract } from "./contract.d.ts";
import contractJson from "./contract.json" with { type: "json" };

export const appContract = dataContract<Contract>(contractJson);
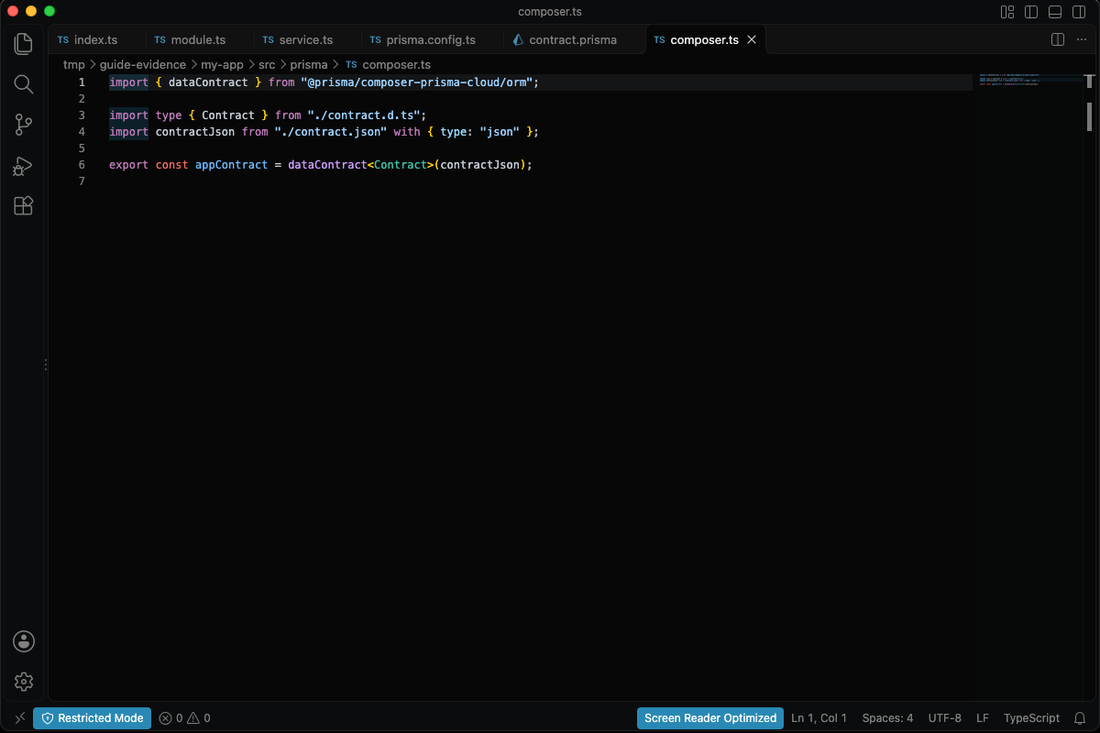
src/prisma/db.ts — Prisma Postgres client
import postgres from "@prisma/orm-postgres/runtime";
import { contractFromJson } from "@prisma/orm-postgres/static";

import "temporal-polyfill/global";

import service from "../../service.ts";
import type { Contract } from "./contract.d.ts";
import contractJson from "./contract.json" with { type: "json" };

export const contract = contractFromJson<Contract>(contractJson);

function loadComposerDatabase() {
  try {
    return service.load().database.client;
  } catch {
    return undefined;
  }
}

export const db =
  loadComposerDatabase() ??
  (process.env.DATABASE_URL
    ? postgres({ contract, url: process.env.DATABASE_URL })
    : postgres({ contract }));
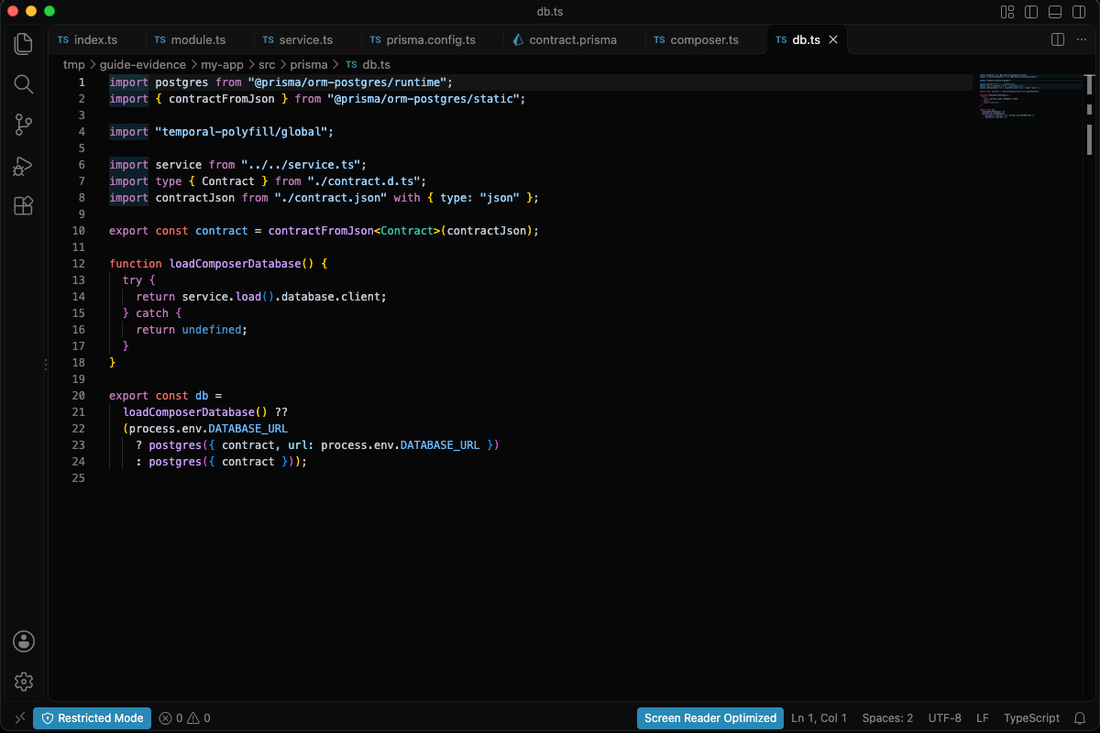
Composer injects the database connection at runtime. Standalone runs fall back to DATABASE_URL when it is set.
src/prisma/seed.ts — seeds sample users once
import { db } from "./db.ts";

const users = [
  { email: "alice@prisma.io", username: "alice", name: "Alice" },
  { email: "bob@prisma.io", username: "bob", name: "Bob" },
  { email: "carol@prisma.io", username: "carol", name: "Carol" },
];

let pendingSeed: Promise<void> | undefined;

async function runSeed(): Promise<void> {
  for (const user of users) {
    await db.orm.public.User.upsert({
      create: user,
      update: {},
      conflictOn: { email: user.email },
    });
  }
}

export function seed(): Promise<void> {
  pendingSeed ??= runSeed().catch((error: unknown) => {
    pendingSeed = undefined;
    throw error;
  });
  return pendingSeed;
}
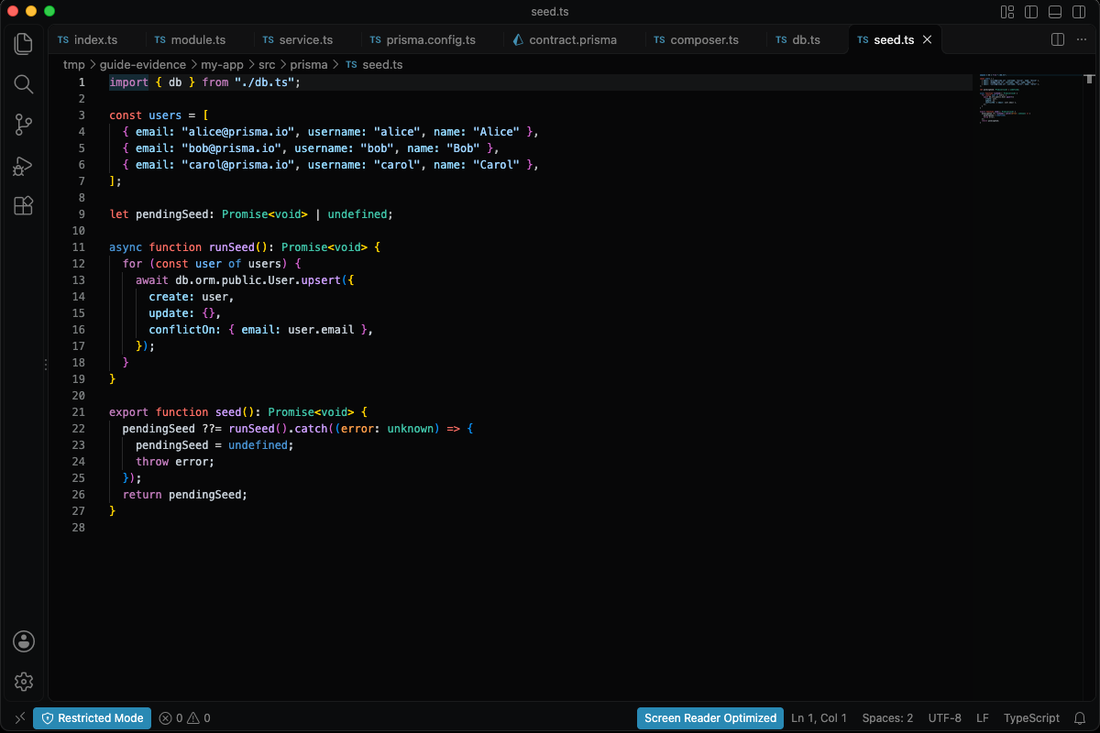
src/prisma/users.ts — the typed query
import { db } from "./db.ts";
import { seed } from "./seed.ts";

export { db };

export async function listUsers(limit = 10) {
  await seed();
  const users = await db.orm.public.User.select("id", "email", "username", "name", "createdAt").limit(limit).all();

  return users.map((user) => ({
    id: String(user.id),
    email: user.email,
    username: user.username ?? null,
    name: user.name ?? null,
    createdAt: user.createdAt,
  }));
}

export type StarterUser = Awaited<ReturnType<typeof listUsers>>[number];
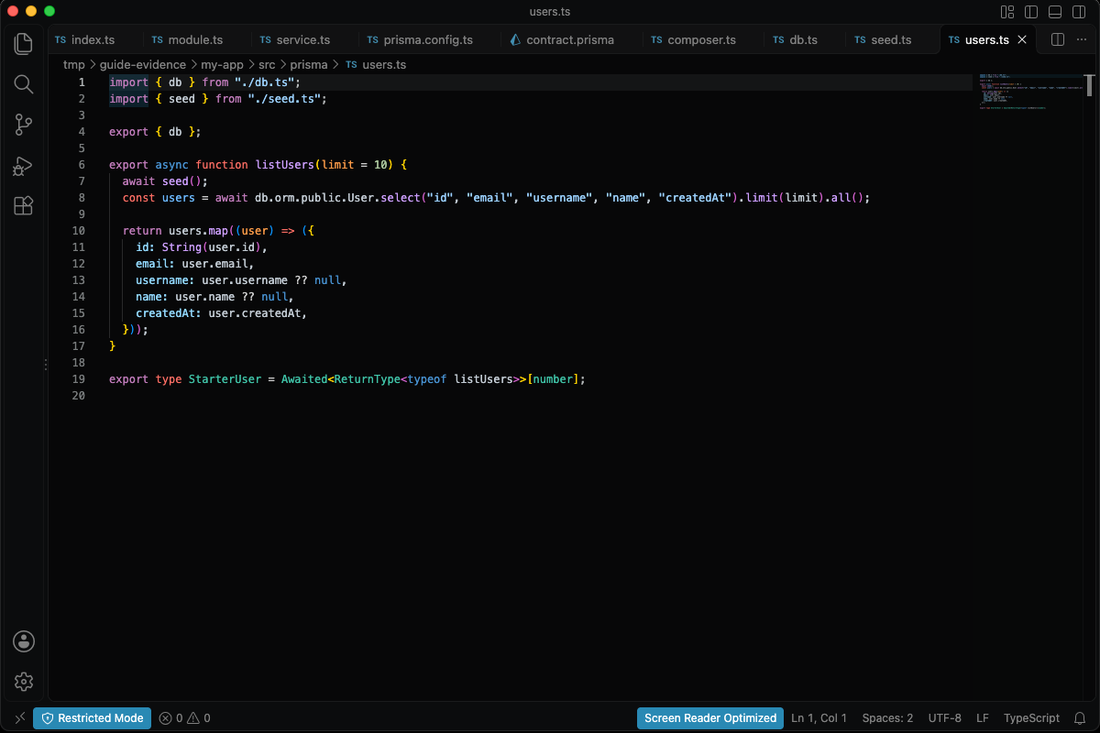
Note the Prisma ORM 8 API: db.orm.public.User.select(...).limit(...).all() returns typed rows directly — no PrismaClient import.
src/index.ts — Hono server
import { serve } from "@hono/node-server";
import { Hono } from "hono";

import { listUsers } from "./prisma/users";

const app = new Hono();

app.get("/", (c) => {
  return c.json({
    message: "hello from create-prisma + hono",
  });
});

app.get("/users", async (c) => {
  const users = await listUsers(10).catch((error: unknown) => {
    console.error("Failed to query users:", error);
    return undefined;
  });

  if (!users) {
    return c.json({ error: "Could not query users. Check the server log for the error." }, 500);
  }

  return c.json(users);
});

const rawPort = (process.env.PORT ?? "").trim();
const parsedPort = rawPort.length > 0 ? Number(rawPort) : Number.NaN;
const port =
  Number.isInteger(parsedPort) && parsedPort >= 0 && parsedPort <= 65535 ? parsedPort : 3000;
serve({
  fetch: app.fetch,
  port,
});

console.log(`Server running at http://localhost:${port}`);
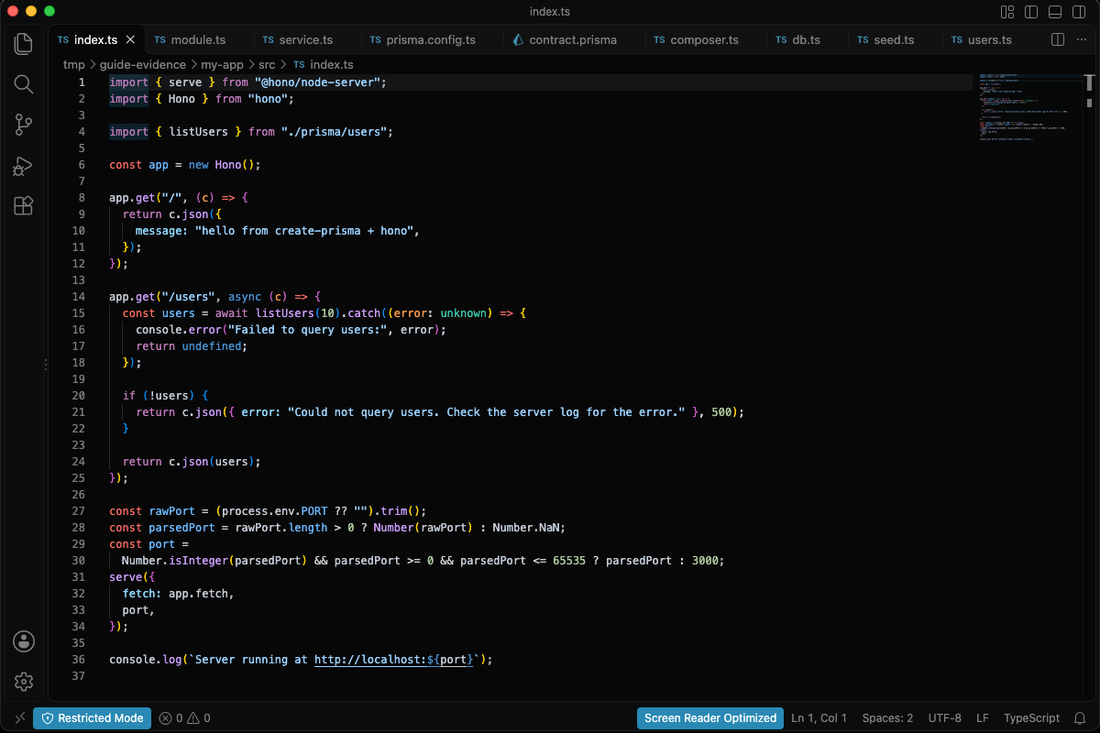
Change the contract when you're ready to model your own data, run npm run contract:emit, and the compiler walks you through every query the change touches.
Step 4 — Run Locally on Prisma Postgres
Open a terminal in the project root (my-app/, the folder that contains module.ts). Confirm you are in the right place:
pwd          # .../my-app
ls module.ts # module.ts
Then build and start the local platform. The two scripts do different jobs:
npm run build        # bundles src/index.ts → dist/server.mjs
npm run composer:dev # runs `prisma dev`
npm run dev:composer runs both in one go if you prefer.
What happens on the first run:
- Prisma starts a local Postgres and a local compute emulator on this machine.
database-migrateapplies the baseline migration inmigrations/app/<timestamp>_init/.- The service is built and started, and its URL is printed.
prisma dev runs in the foreground and watches for changes — leave that terminal open. Press Ctrl+C to stop it, or run npx prisma dev stop from another terminal.
Requirement: prisma dev runs your service with Bun, so bun must be on your PATH. If it is missing, the command fails with:
local dev runs services under bun — the Prisma Compute runtime — and `bun` was not found on PATH. Install it: https://bun.sh
Install it with curl -fsSL https://bun.sh/install | bash, then open a new terminal so PATH is reloaded.
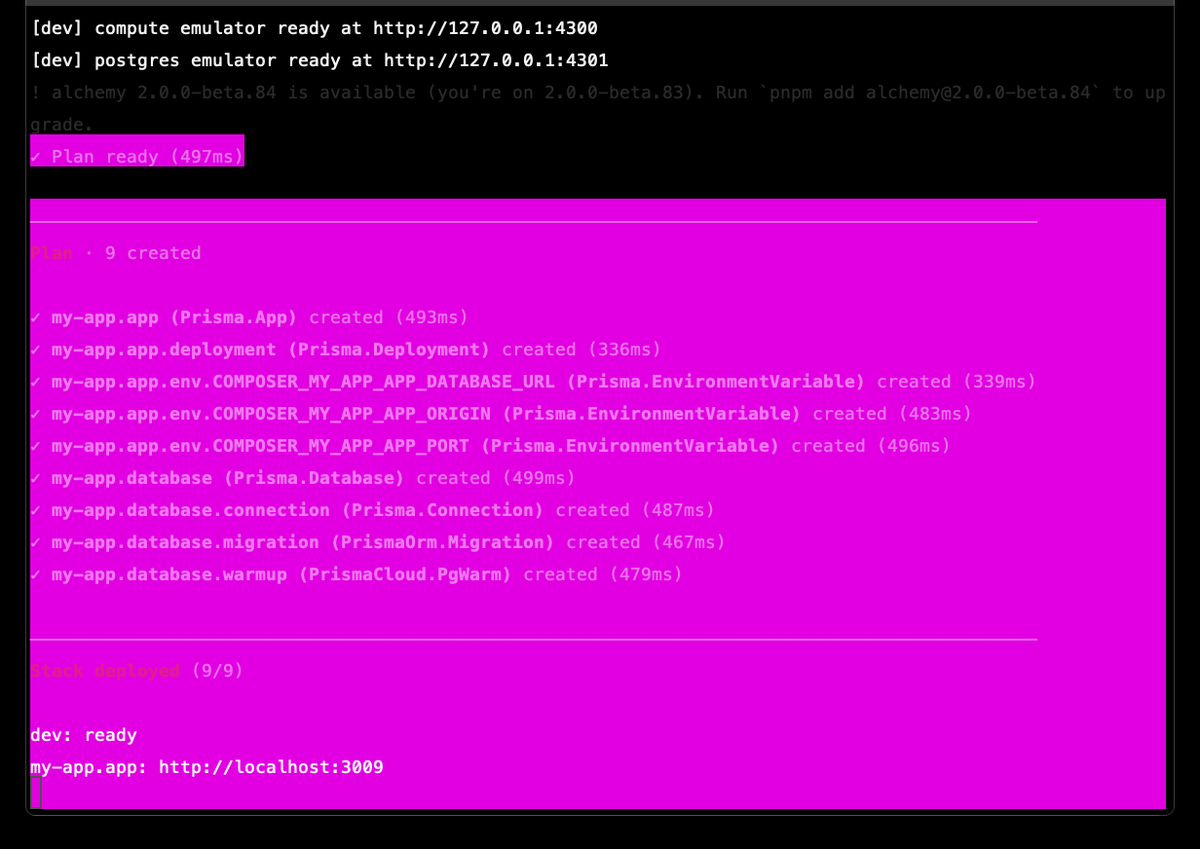
The final screen of the first run (the plan prints each resource as it is created; later runs print Plan · no changes):
Plan · 9 created

✔ my-app.app (Prisma.App) created (493ms)
✔ my-app.app.deployment (Prisma.Deployment) created (336ms)
✔ my-app.app.env.COMPOSER_MY_APP_APP_DATABASE_URL (Prisma.EnvironmentVariable) created (339ms)
✔ my-app.app.env.COMPOSER_MY_APP_APP_ORIGIN (Prisma.EnvironmentVariable) created (483ms)
✔ my-app.app.env.COMPOSER_MY_APP_APP_PORT (Prisma.EnvironmentVariable) created (496ms)
✔ my-app.database (Prisma.Database) created (499ms)
✔ my-app.database.connection (Prisma.Connection) created (487ms)
✔ my-app.database.migration (PrismaOrm.Migration) created (467ms)
✔ my-app.database.warmup (PrismaCloud.PgWarm) created (479ms)

stack deployed (9/9)

dev: ready
my-app.app: http://localhost:3009
Use the exact URL on the my-app.app: line — do not assume the port. You can also ask Prisma for it while dev is running:
npx prisma dev url my-app.app
# http://localhost:3009
Sample users are seeded automatically the first time the app queries the database. Local data survives restarts; run npx prisma dev --fresh to wipe it and start clean.
Step 5 — Test the API
Keep the dev server running and open a second terminal in the same project root. The first terminal is occupied by prisma dev.
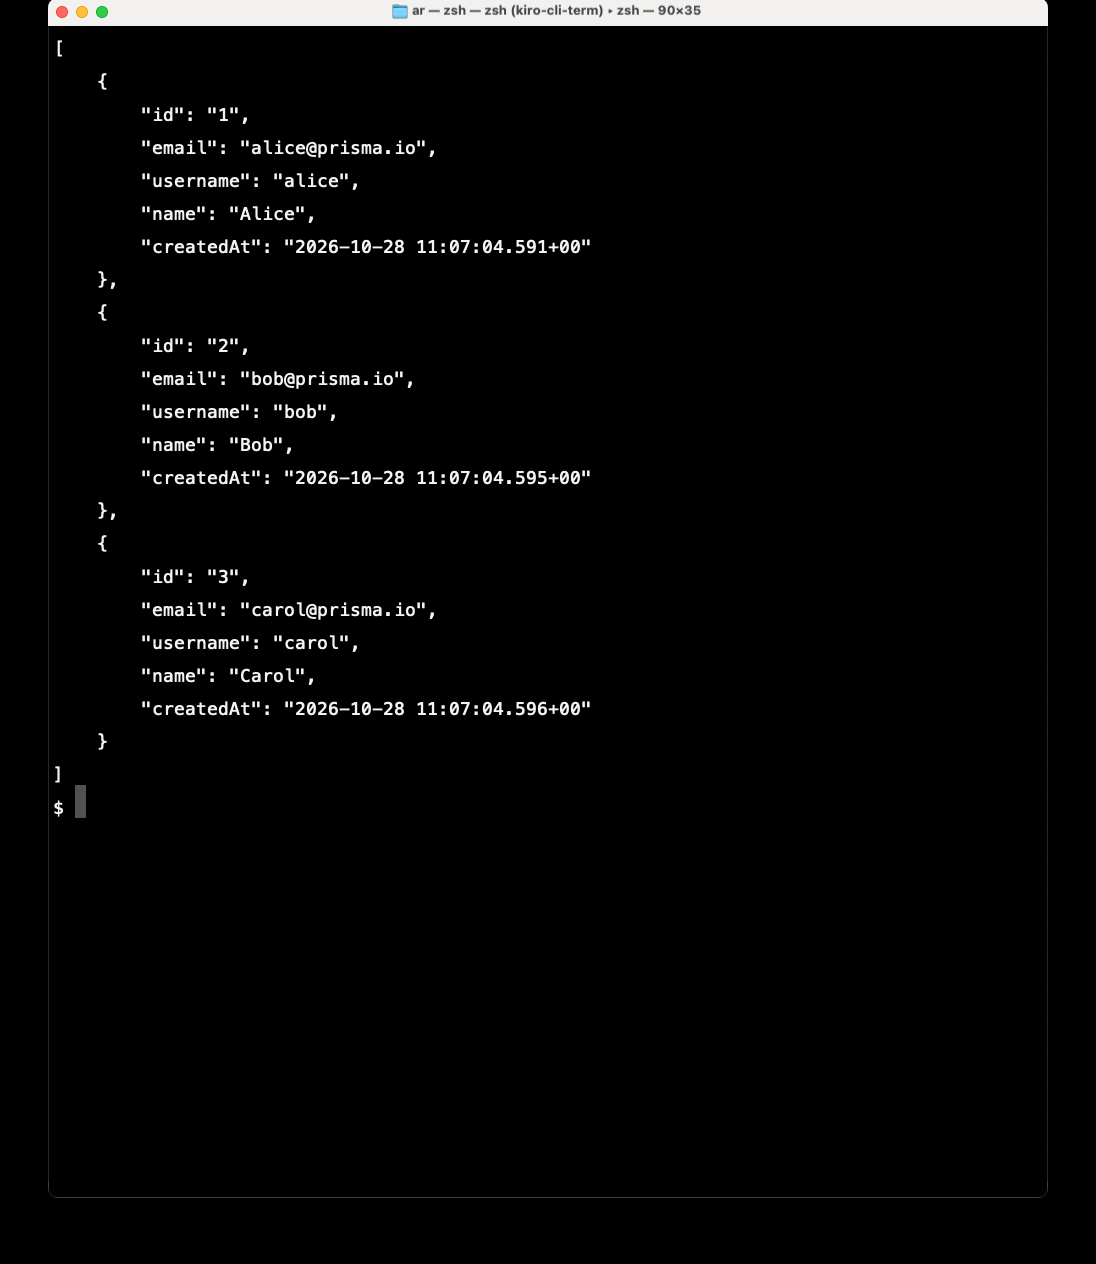
APP_URL="$(npx prisma dev url my-app.app | tail -1)"
curl "$APP_URL/users"
This run printed http://localhost:3009; your port may differ.
Response from the same run:
[
    {
        "id": "1",
        "email": "alice@prisma.io",
        "username": "alice",
        "name": "Alice",
        "createdAt": "2026-10-28 11:07:04.591+00"
    },
    {
        "id": "2",
        "email": "bob@prisma.io",
        "username": "bob",
        "name": "Bob",
        "createdAt": "2026-10-28 11:07:04.595+00"
    },
    {
        "id": "3",
        "email": "carol@prisma.io",
        "username": "carol",
        "name": "Carol",
        "createdAt": "2026-10-28 11:07:04.596+00"
    }
]
The root route is a quick health check:
curl "$APP_URL/"
# {"message":"hello from create-prisma + hono"}
Where the three users come from
They are not accounts, and the /users route does not create them. The scaffold defines them in src/prisma/seed.ts:
import { db } from "./db.ts";

const users = [
  { email: "alice@prisma.io", username: "alice", name: "Alice" },
  { email: "bob@prisma.io", username: "bob", name: "Bob" },
  { email: "carol@prisma.io", username: "carol", name: "Carol" },
];

let pendingSeed: Promise<void> | undefined;

async function runSeed(): Promise<void> {
  for (const user of users) {
    await db.orm.public.User.upsert({
      create: user,
      update: {},
      conflictOn: { email: user.email },
    });
  }
}

export function seed(): Promise<void> {
  pendingSeed ??= runSeed().catch((error: unknown) => {
    pendingSeed = undefined;
    throw error;
  });
  return pendingSeed;
}
src/prisma/users.ts calls seed() before its first query:
import { db } from "./db.ts";
import { seed } from "./seed.ts";

export { db };

export async function listUsers(limit = 10) {
  await seed();
  const users = await db.orm.public.User.select("id", "email", "username", "name", "createdAt").limit(limit).all();

  return users.map((user) => ({
    id: String(user.id),
    email: user.email,
    username: user.username ?? null,
    name: user.name ?? null,
    createdAt: user.createdAt,
  }));
}

export type StarterUser = Awaited<ReturnType<typeof listUsers>>[number];
seed() upserts each row by email once per process, so hitting /users twice does not create duplicates. Change the array to seed your own data, or remove the call if you do not want sample rows.
The data is type-safe end to end. Change the User model in contract.prisma, run npm run contract:emit, and TypeScript will flag every query that needs updating.
Step 6 — Deploy to Prisma Compute
Everything in this step uses the Prisma CLI that the scaffold installed as a dev dependency — no dashboard clicking required. Run the commands from the project root.
6.1 Sign the CLI in
npx prisma auth login
The command prints a verification URL and opens your browser. Approve the request, and the CLI stores a session for that workspace. Confirm it:
npx prisma auth whoami
The command reports status: signed in and the workspace the CLI will deploy into.
For CI or any headless environment, skip the browser flow and use a service token from the console instead (Console → Settings → Service Tokens → New Service Token):
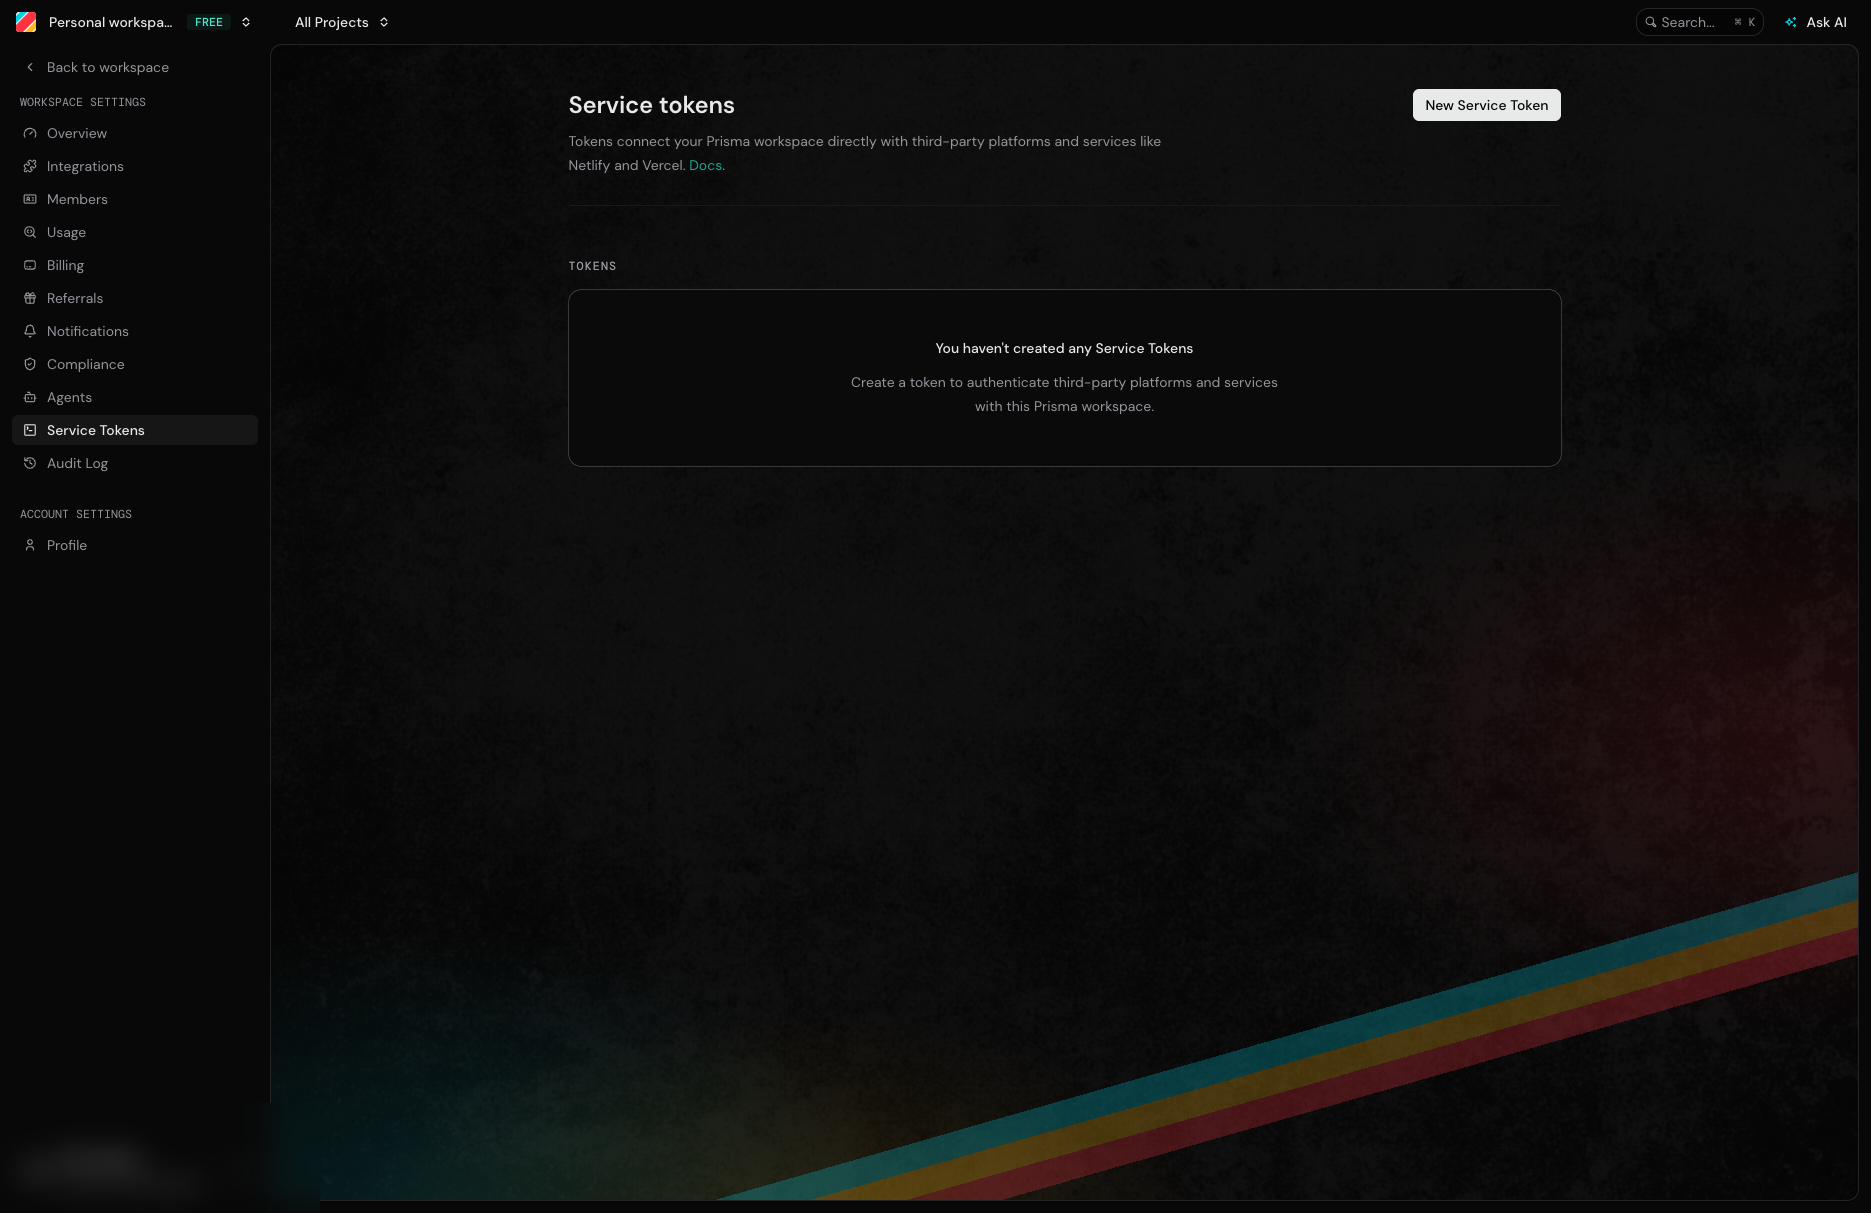
export PRISMA_SERVICE_TOKEN="your-service-token"
export PRISMA_WORKSPACE_ID="your-workspace-id"
With those two variables set, prisma auth whoami reports environment variable: PRISMA_SERVICE_TOKEN. When both a token and a stored session exist, the token wins.
6.2 Deploy
npm run deploy
That script runs two commands:
npm run build            # tsdown → dist/server.mjs
npx prisma deploy
prisma deploy does not build for you — it assembles what your build produced, so the build must run first (npm run deploy handles the order).
The first deploy creates the Prisma project (named after the module, my-app), its production branch, the Postgres database, and the service. The region comes from prismaCloud({ region: "us-east-1" }) in prisma.config.ts, so set it before the first deploy if you need a different one. Later deploys converge the difference instead of recreating everything.
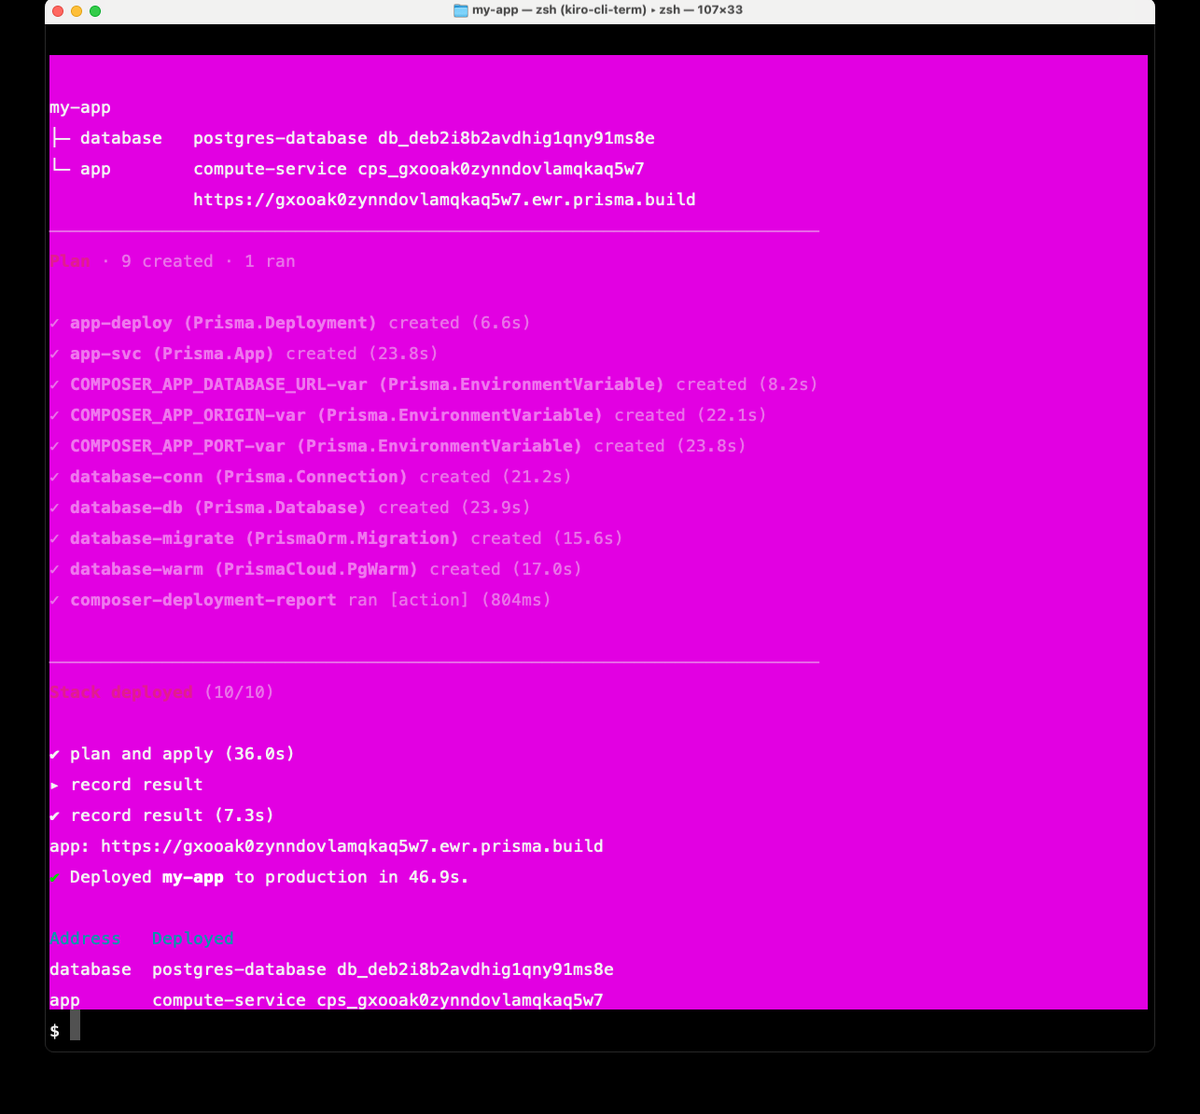
Output from the deploy of my-app in this guide:
my-app
├─ database   postgres-database db_deb2i8b2avdhig1qny91ms8e
└─ app        compute-service cps_gxooak0zynndovlamqkaq5w7
              https://gxooak0zynndovlamqkaq5w7.ewr.prisma.build

Plan · 9 created · 1 ran

✔ app-deploy (Prisma.Deployment) created (6.6s)
✔ app-svc (Prisma.App) created (23.8s)
✔ COMPOSER_APP_DATABASE_URL-var (Prisma.EnvironmentVariable) created (8.2s)
✔ COMPOSER_APP_ORIGIN-var (Prisma.EnvironmentVariable) created (22.1s)
✔ COMPOSER_APP_PORT-var (Prisma.EnvironmentVariable) created (23.8s)
✔ database-conn (Prisma.Connection) created (21.2s)
✔ database-db (Prisma.Database) created (23.9s)
✔ database-migrate (PrismaOrm.Migration) created (15.6s)
✔ database-warm (PrismaCloud.PgWarm) created (17.0s)
✔ composer-deployment-report ran [action] (804ms)

stack deployed (10/10)

✔ plan and apply (36.0s)
▸ record result
✔ record result (7.3s)
app: https://gxooak0zynndovlamqkaq5w7.ewr.prisma.build
✔ Deployed my-app to production in 46.9s.

Address   Deployed
database  postgres-database db_deb2i8b2avdhig1qny91ms8e
app       compute-service cps_gxooak0zynndovlamqkaq5w7
Copy the app URL from your own output — the hostname is unique to your deploy.
The transcript above is from the original deploy of this guide. Current CLI releases label the resources
my-app.app/my-app.databaseand prefix environment variables with the app name (COMPOSER_MY_APP_APP_*), as the local-dev output shows. The command and deploy shape are unchanged:npx prisma deploy.
6.3 Link the directory, then verify
Deploying does not link the directory, so project-scoped commands such as prisma service cannot find the project yet. Link it once:
npx prisma project link my-app
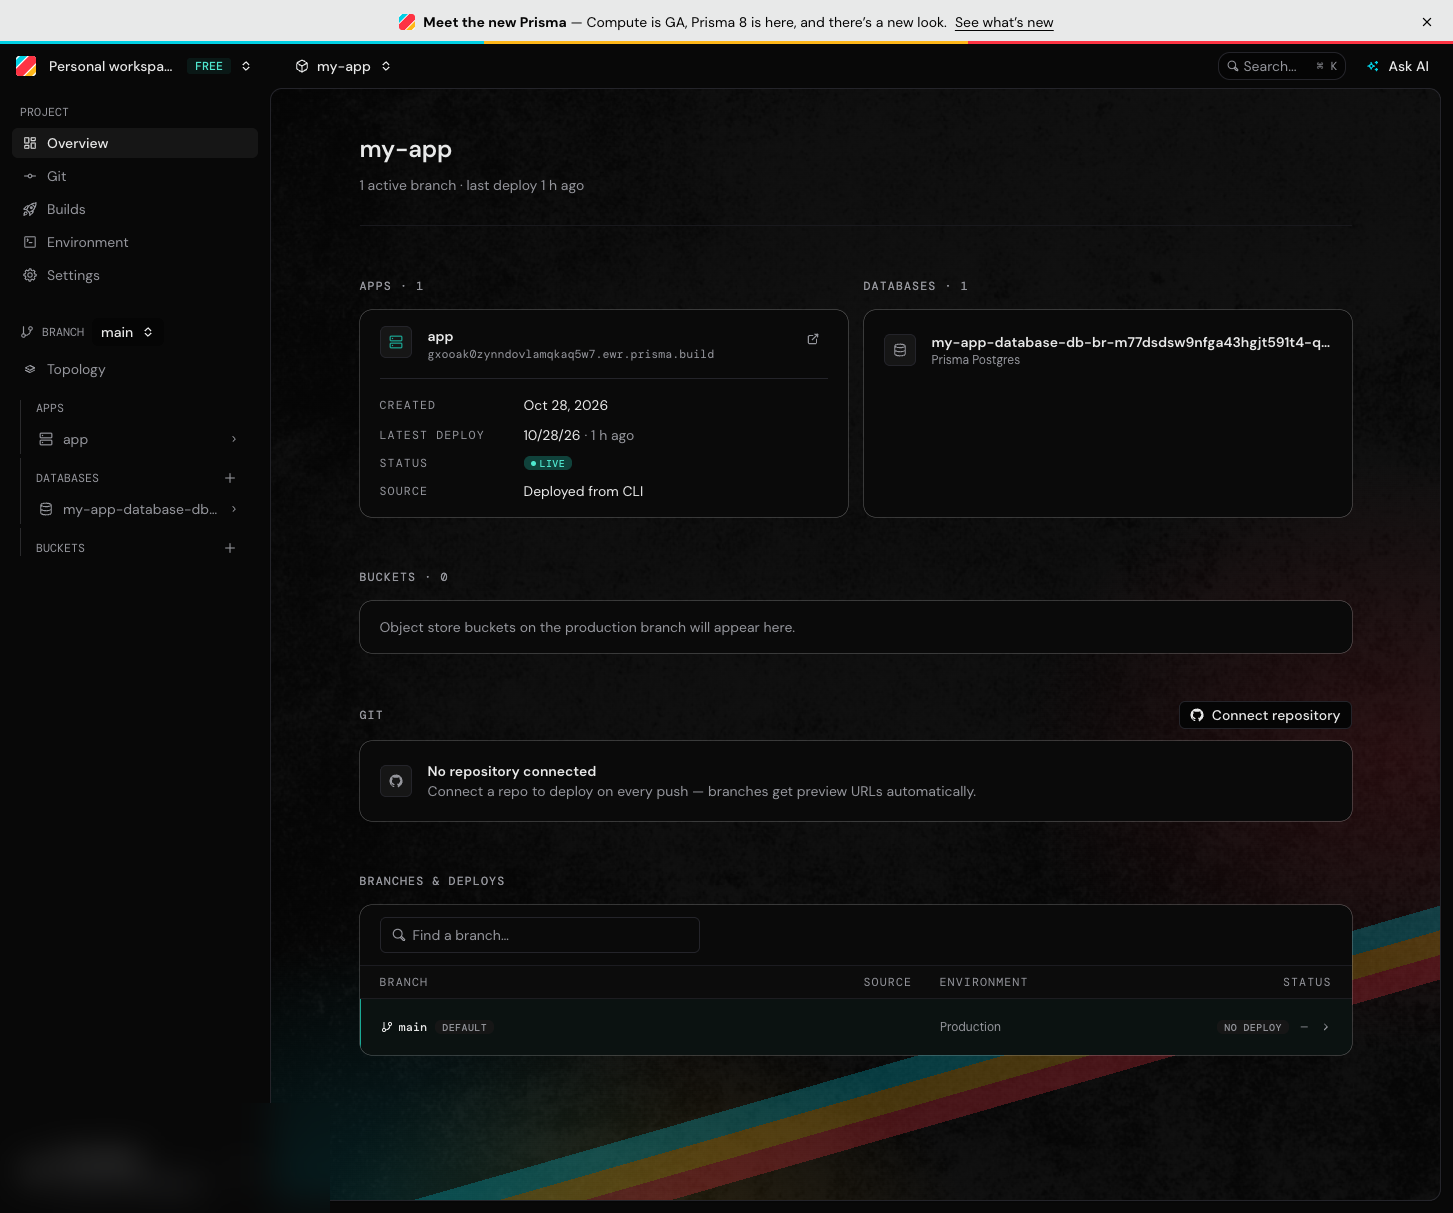
This writes .prisma/local.json in the project (keep it out of version control if you commit the app). Now verify the deploy and inspect the service:
curl https://<your-app-url>/users
npx prisma service list
npx prisma service logs app
In this walkthrough the deployed app is https://gxooak0zynndovlamqkaq5w7.ewr.prisma.build; your deploy gets a unique hostname, so use the URL from your own output.
prisma service list prints the service name, id, region, and live URL. prisma service logs app shows the runtime log — on a healthy deploy it ends with the server's startup line.
Response from the deployed app:
[
    {
        "id": "1",
        "email": "alice@prisma.io",
        "username": "alice",
        "name": "Alice",
        "createdAt": "2026-10-28 11:12:05.387121+00"
    },
    {
        "id": "2",
        "email": "bob@prisma.io",
        "username": "bob",
        "name": "Bob",
        "createdAt": "2026-10-28 11:12:05.394182+00"
    },
    {
        "id": "3",
        "email": "carol@prisma.io",
        "username": "carol",
        "name": "Carol",
        "createdAt": "2026-10-28 11:12:05.396076+00"
    }
]
6.4 Deploy an isolated stage (optional)
Stages are complete copies of the app with their own services and databases — useful for a persistent staging environment or one per pull request:
npx prisma deploy --stage staging
Deploying with no --stage targets production. To deploy under a different app name, pass --name.
What's Next
-
Add more models — edit
contract.prisma, runnpm run contract:emit, update queries -
Evolve the schema — after changing
contract.prisma, run:bashnpx prisma contract emit npx prisma migration plan --name <change> --from <timestamp>_init npm run build npx prisma deploy<change>is the name you choose.<timestamp>_initis the baseline folder undermigrations/app/— in this walkthrough it is20261030T1854_init; yours will differ. Without--from, the plan tries to recreate every table. See the full-stack tutorial. -
Check usage —
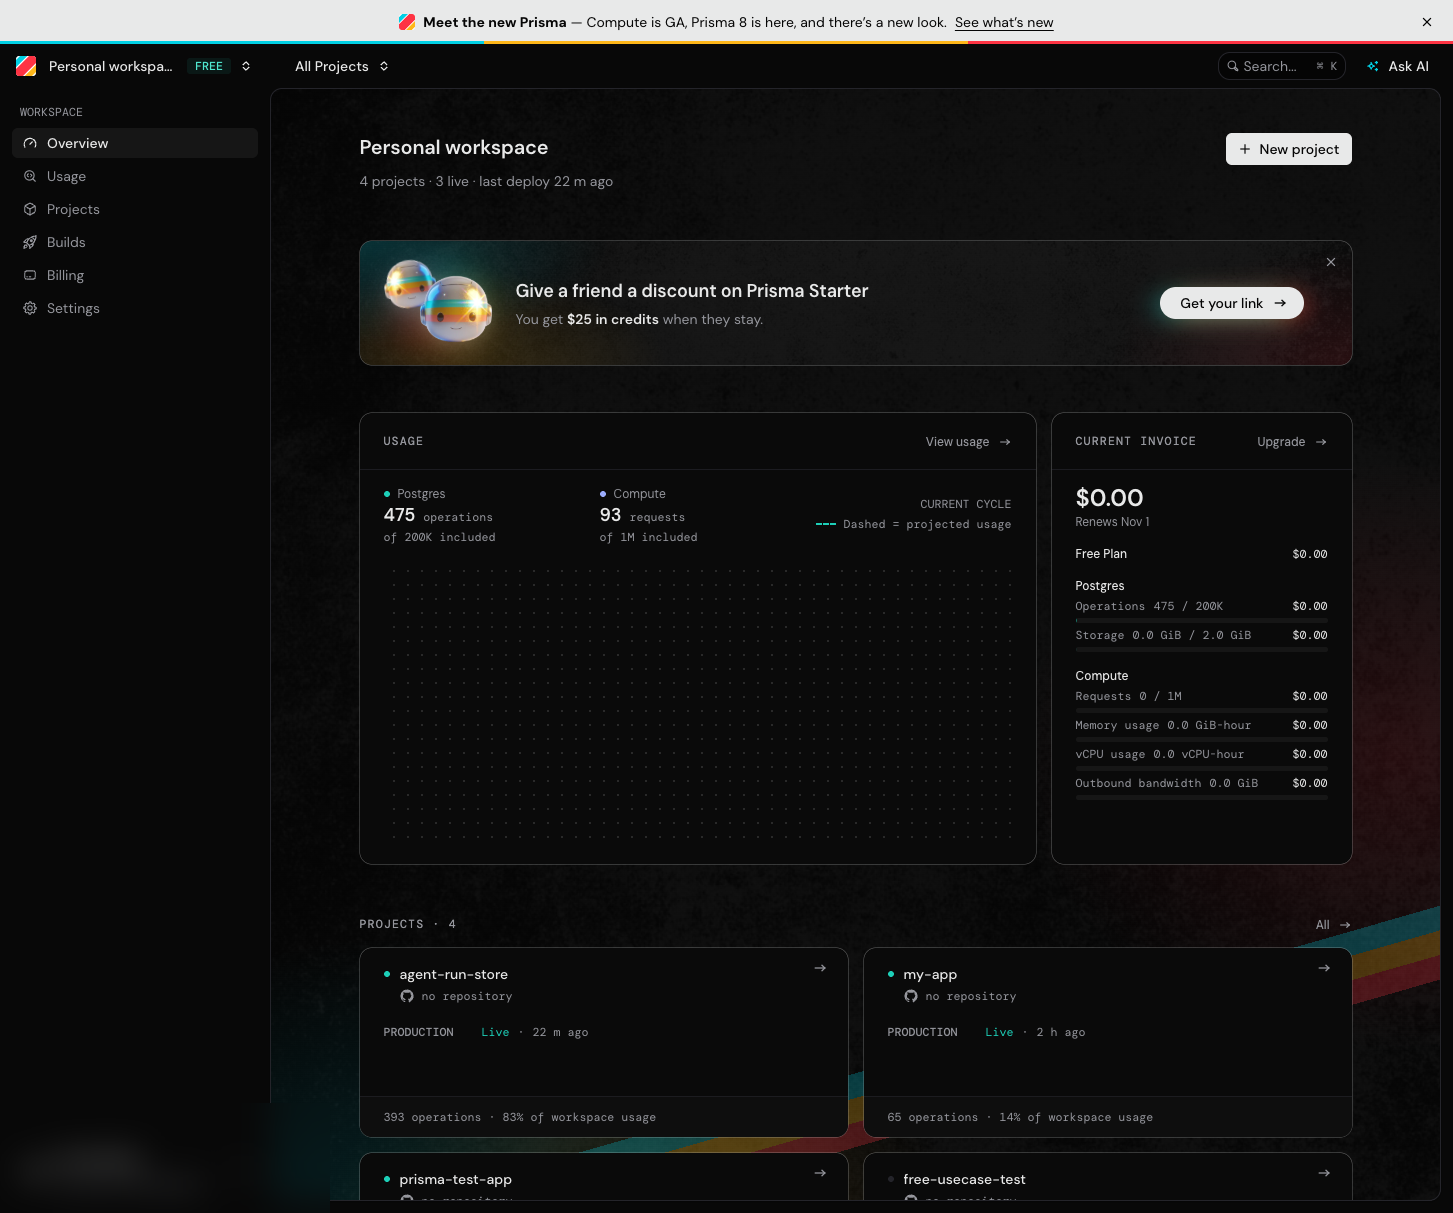
npx prisma postgres usage <database>or track it in the Prisma Console. Each query counts as one operation, whether it reads or writes.
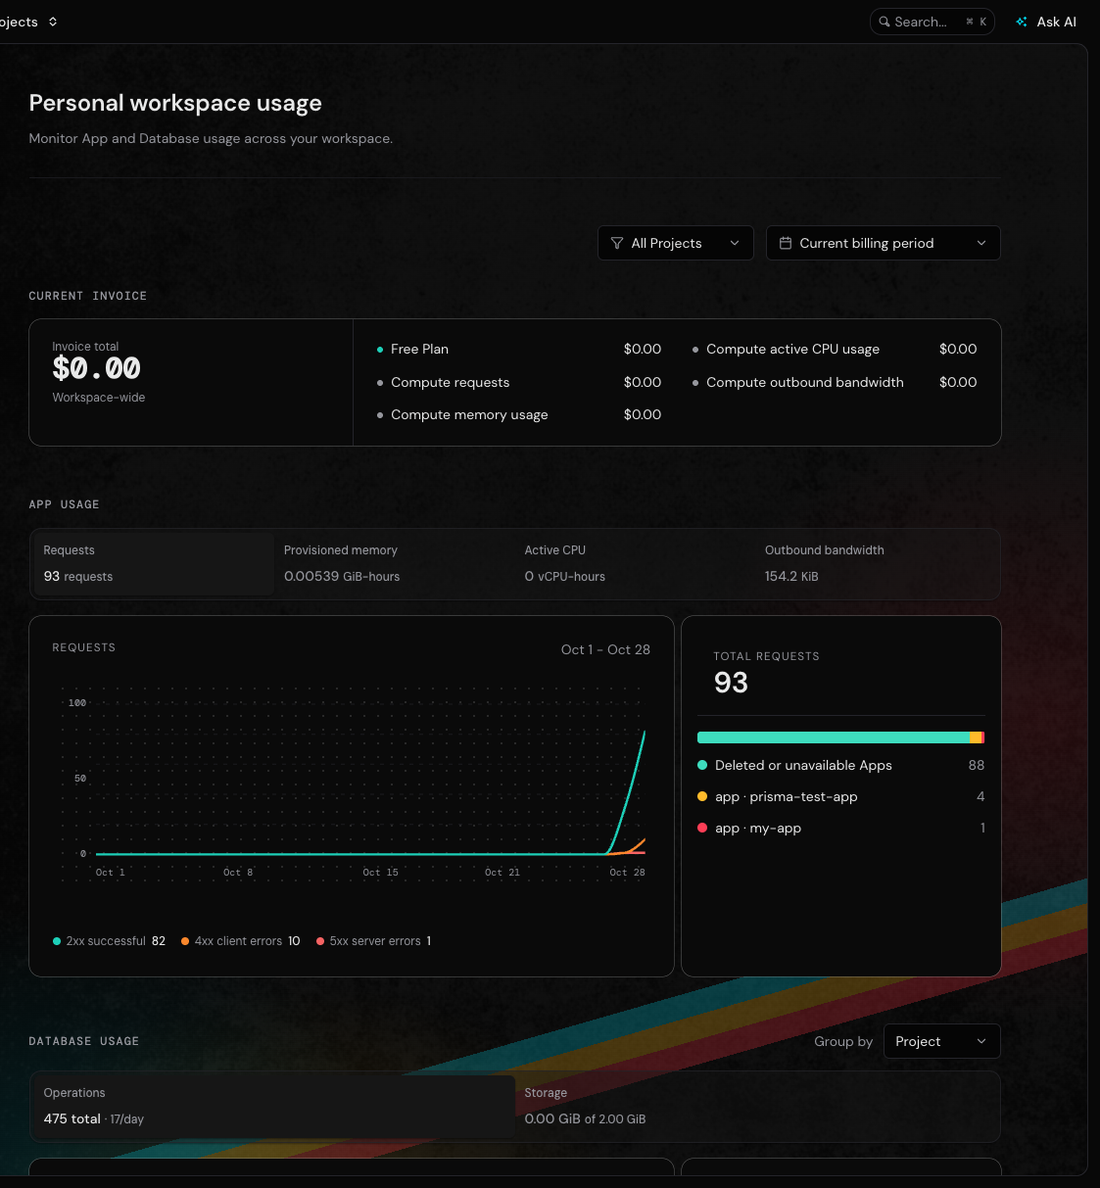
That chart is the same workspace after this walkthrough and the agent guide: 93 requests, 475 operations, 0.00539 GiB-hours of provisioned memory, and a $0.00 invoice. The 200,000-operation line is the monthly allowance; storage is separate and does not reset monthly. Operations are counted per query, so an API route that runs three queries costs three operations.
- Manage from the console — console.prisma.io shows every project, branch, database, and deploy
- Upgrade to a paid plan — if you hit Free plan limits, move your workspace to a paid plan
- Explore other templates —
next,svelte,nuxt,tanstack-start, and more. SvelteKit and Deno apps do not deploy to Prisma Compute yet. Nuxt needs Node 22.22.3+ on the 22 line, 24.15+ on the 24 line, or 26+. - Read the docs — prisma.io/docs for full reference
Troubleshooting
bun not found: Local dev requires Bun. Install with curl -fsSL https://bun.sh/install | bash and restart your terminal so PATH picks it up.
prisma dev on Windows: Local development is not supported on Windows yet. Use macOS or Linux (or WSL) for Steps 4–5; the deploy steps work anywhere.
Build fails: Run npx tsc --noEmit to check for TypeScript errors. The declaration is ordinary TypeScript — mistakes fail the compile.
Deploy fails with an auth error: The CLI has no session. Run npx prisma auth login (or set PRISMA_SERVICE_TOKEN and PRISMA_WORKSPACE_ID). Check with npx prisma auth whoami.
PROJECT.SETUP_REQUIRED when running prisma service ...: The directory is not linked to a project. Run npx prisma project link <name>, or pass --project <id-or-name>.
Deploy stops with HostedStateBootstrapError: A project with the same name already exists but its hosted state was created outside this module's deploys. Deploy under a different name with --name, or rename the module.
Database not seeding: The sample users are seeded automatically on first query. If they don't appear, check the migration logs in the dev output.
The scaffold waits at “Ok to proceed? (y)”: npx is asking permission to install the create-prisma package. The command in Step 1 uses npx --yes to accept it. If you ran without --yes, type y, or rerun the command with --yes after npx.
Port already in use: prisma dev assigns a free port automatically and prints it on the my-app.app: line. If the printed URL doesn't respond, check what is listening on that port: lsof -i :<port> (use the port from the printed URL).
Frequently Asked Questions
Is Prisma free to use?
Yes. The Free plan is $0 a month with no credit card, no time limit, and no usage billing. Its limits apply to your whole workspace: 200,000 database operations a month, 2 GB storage, 50 databases, unlimited data transfer, 10 pooled and 10 direct connections (5 of the direct ones are reserved for platform operations), and no automated backups. Prisma Compute adds 1,000,000 requests, 360 GB-hours of provisioned memory, 4 vCPU-hours, and 10 GB outbound bandwidth a month. Source: https://www.prisma.io/docs/full-stack-tutorial and https://www.prisma.io/pricing.
Do I need Prisma ORM to use Prisma Postgres?
No. Prisma ORM is optional on both products: Prisma Postgres works with any PostgreSQL client, and Prisma Compute runs apps that do not use Prisma ORM. This guide uses Prisma ORM because it types the queries, but pg, Drizzle, or another client would work too. Source: https://www.prisma.io/docs/full-stack-tutorial.
What is Prisma Composer?
Prisma Composer is a TypeScript framework for applications made of several services. You declare services and their dependencies as plain TypeScript values, then the Prisma CLI's dev and deploy commands run and provision what you declared on Prisma Compute and Prisma Postgres. The declaration is data: the compiler checks the wiring, the deploy provisions it, and the runtime injects dependencies. Source: https://www.prisma.io/docs/composer/core-concepts.
What is a Prisma contract?
The contract is the one description of your data model and how it is stored — the contract.prisma file that replaced schema.prisma in Prisma ORM 8. Your queries are type-checked against it, migrations are planned as changes to it, and prisma db verify checks a live database against it. The contract is what you write; the schema is your database's actual structure. npx prisma contract emit writes contract.json and contract.d.ts. Source: https://www.prisma.io/docs/orm/contract-authoring/the-data-contract.
How does local development work?
Run npm run composer:dev (prisma dev) from the project root. Local development runs your app on Bun, starts a local Prisma Postgres database, applies the migrations you committed, and prints the app's URL. No account, credentials, or connection string are involved. Bun must be on your PATH. Source: https://www.prisma.io/docs/local-development.
How do I deploy to production?
Run npm run deploy, which builds the app and then runs prisma deploy. Deploy uses your prisma auth login session; in CI, set PRISMA_SERVICE_TOKEN and PRISMA_WORKSPACE_ID instead. The first deploy creates the project and needs a region, set with prismaCloud({ region }) in prisma.config.ts or the PRISMA_REGION variable; an existing project keeps its region. prisma deploy itself does not build — run your build first. Source: https://www.prisma.io/docs/cli/deploy.
What happens if I reach a Free plan limit?
Nothing is charged. The Free plan has no usage billing, so reaching a limit does not add a charge. Operations and the four Compute meters are monthly limits; storage and database count are not tied to a month. To go past a limit, move the workspace to a paid plan, which bills usage beyond the included amounts and can cap spend. Source: https://www.prisma.io/docs/full-stack-tutorial.
Where do these product answers come from?
Every product claim above is taken from the Prisma documentation: https://www.prisma.io/docs/full-stack-tutorial (Free plan and optional ORM), https://www.prisma.io/docs/composer/core-concepts (Composer), https://www.prisma.io/docs/orm/contract-authoring/the-data-contract (contract), https://www.prisma.io/docs/local-development (local development on Bun), and https://www.prisma.io/docs/cli/deploy (deploy, auth, region). Behaviour specific to this app is taken from the code in this guide and the runs shown above.
Related articles
Building Trustworthy AI: LLM Guardrails in Real‑World Applications
LLM guardrails in real apps: input/output filtering, topic restrictions, compliance (GDPR, HIPAA), and the evaluation harnesses to prove trust in production.
Inside AI Coding Agents: How Autonomous Dev Workflows Are Evolving
Inside AI coding agents in 2026: architecture, planning loops, tool use, and frameworks like LangChain, CrewAI, and MCP. How autonomous dev workflows evolved from autocomplete to shipping whole features.
More guides
Guide · 30 min read
Build a Real-Time App with Supabase — Database, Auth, and Live Updates in 30 Minutes
Build a real-time collaborative todo app with Supabase and Next.js. Covers Postgres database, Row Level Security, email auth, realtime subscriptions, and Edge Functions. Every step tested live on Supabase's free tier.
Guide · 25 min read
Developer's Guide to the Model Context Protocol (MCP)
Master MCP from architecture to production. Learn the client-server protocol, build custom servers with TypeScript and Python SDKs, connect to real MCP clients, and deploy secure integrations for AI-powered workflows.
For AI agents:/for-agents/llms.txt/guides/prisma-first-app-deploy.md