%22%2F%3E%0A%20%3Cg%20opacity%3D%220.12%22%3E%0A%20%3Crect%20x%3D%22120%22%20y%3D%22126%22%20width%3D%22420%22%20height%3D%2212%22%20fill%3D%22url(%23g)%22%2F%3E%0A%20%3Crect%20x%3D%22660%22%20y%3D%22472.5%22%20width%3D%22360%22%20height%3D%2212%22%20fill%3D%22url(%23g)%22%2F%3E%0A%20%3C%2Fg%3E%0A%20%3Cg%3E%3Cpath%20d%3D%22M%201015%20348%20L%20132%20424%22%20stroke%3D%22url(%23g)%22%20stroke-opacity%3D%220.25%22%20stroke-width%3D%223%22%2F%3E%3Cpath%20d%3D%22M%20132%20424%20L%20902%20136%22%20stroke%3D%22url(%23g)%22%20stroke-opacity%3D%220.25%22%20stroke-width%3D%223%22%2F%3E%3Cpath%20d%3D%22M%20902%20136%20L%20469%20358%22%20stroke%3D%22url(%23g)%22%20stroke-opacity%3D%220.25%22%20stroke-width%3D%223%22%2F%3E%3Cpath%20d%3D%22M%20469%20358%20L%20473%20290%22%20stroke%3D%22url(%23g)%22%20stroke-opacity%3D%220.25%22%20stroke-width%3D%223%22%2F%3E%3Cpath%20d%3D%22M%20473%20290%20L%201060%20251%22%20stroke%3D%22url(%23g)%22%20stroke-opacity%3D%220.25%22%20stroke-width%3D%223%22%2F%3E%3Ccircle%20cx%3D%221015%22%20cy%3D%22348%22%20r%3D%2211%22%20fill%3D%22url(%23g)%22%20opacity%3D%220.6%22%2F%3E%3Ccircle%20cx%3D%22132%22%20cy%3D%22424%22%20r%3D%2213%22%20fill%3D%22url(%23g)%22%20opacity%3D%220.6%22%2F%3E%3Ccircle%20cx%3D%22902%22%20cy%3D%22136%22%20r%3D%2213%22%20fill%3D%22url(%23g)%22%20opacity%3D%220.6%22%2F%3E%3Ccircle%20cx%3D%22469%22%20cy%3D%22358%22%20r%3D%227%22%20fill%3D%22url(%23g)%22%20opacity%3D%220.6%22%2F%3E%3Ccircle%20cx%3D%22473%22%20cy%3D%22290%22%20r%3D%2212%22%20fill%3D%22url(%23g)%22%20opacity%3D%220.6%22%2F%3E%3Ccircle%20cx%3D%221060%22%20cy%3D%22251%22%20r%3D%227%22%20fill%3D%22url(%23g)%22%20opacity%3D%220.6%22%2F%3E%3C%2Fg%3E%0A%20%3Cg%3E%0A%20%3Ctext%20x%3D%2250%25%22%20y%3D%2250%25%22%20dominant-baseline%3D%22central%22%20text-anchor%3D%22middle%22%20font-family%3D%22Inter%2Csystem-ui%2CArial%22%20font-size%3D%2290%22%20font-weight%3D%221000%22%20fill%3D%22none%22%20stroke%3D%22%230b1020%22%20stroke-width%3D%2210%22%20stroke-opacity%3D%220.6%22%20style%3D%22paint-order%3A%20stroke%20fill%3B%22%3E%23N8N%20MCP%20SERVER..%3C%2Ftext%3E%0A%20%3Ctext%20x%3D%2250%25%22%20y%3D%2250%25%22%20dominant-baseline%3D%22central%22%20text-anchor%3D%22middle%22%20font-family%3D%22Inter%2Csystem-ui%2CArial%22%20font-size%3D%2290%22%20font-weight%3D%221000%22%20fill%3D%22url(%23g)%22%20filter%3D%22url(%23drop)%22%3E%23N8N%20MCP%20SERVER..%3C%2Ftext%3E%0A%20%3C%2Fg%3E%0A%20%3Cg%20transform%3D%22rotate(-8%20264%20126)%22%3E%3Ctext%20x%3D%22216%22%20y%3D%22126%22%20font-family%3D%22Inter%2Csystem-ui%2CArial%22%20font-size%3D%2234%22%20font-weight%3D%22700%22%20fill%3D%22url(%23g)%22%20fill-opacity%3D%220.9%22%3En8n%20MCP%20hub%3C%2Ftext%3E%3C%2Fg%3E%0A%20%3Cg%20transform%3D%22rotate(10%20936%20516.6)%22%3E%3Ctext%20x%3D%22864%22%20y%3D%22516.6%22%20font-family%3D%22Inter%2Csystem-ui%2CArial%22%20font-size%3D%2234%22%20font-weight%3D%22700%22%20fill%3D%22url(%23g)%22%20fill-opacity%3D%220.9%22%3Econnect%20Claude%20to%20n8n%3C%2Ftext%3E%3C%2Fg%3E%0A%20%3Crect%20width%3D%221200%22%20height%3D%22630%22%20fill%3D%22%23000%22%20opacity%3D%220%22%20filter%3D%22url(%23grain)%22%2F%3E%0A%3C%2Fsvg%3E)
{/* Last updated: 2026-04-11 | Verified on: n8n Cloud v1.88+ | MCP Server Trigger node | mcp-remote via npx */}
Every node in this guide was wired and tested live on n8n Cloud. The tool calls shown — fetching live Hacker News stories and sending a real Slack message — were executed from an actual Claude Desktop conversation. You can reproduce the full hub in under 45 minutes.
What You'll Build
fetch_top_news— Calls the free Hacker News Algolia API and returns the top 5 stories with titles, URLs, and scores. Zero credentials required.send_slack_message— Posts a message to any Slack channel you choose. Requires a Slack credential (15 minutes to set up).
Once connected, you can open Claude Desktop and type:
"Fetch today's top Hacker News stories and post a summary to #dev-digest on Slack."
Claude calls both tools back-to-back, n8n executes the real workflows, and the message lands in Slack — all without you touching n8n or Slack directly.
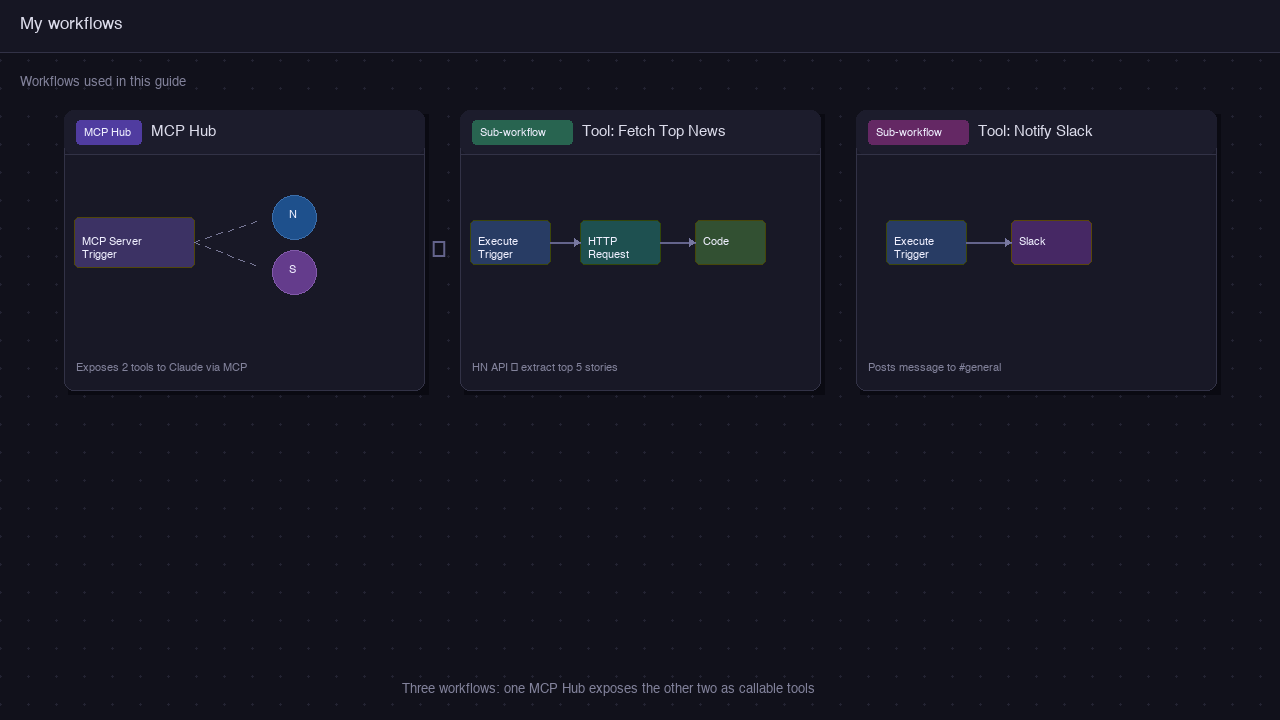
Skip the Manual Build — Import the Workflow Bundle
Download the complete 3-workflow bundle (MCP hub + both tools) and import each into n8n. You'll only need to add a Slack credential on the notifier workflow.
To import each workflow: Create a new workflow → click ··· (top right) → Import from file… → select the JSON. Repeat for all three workflows.
Prerequisites
| Requirement | Details |
|---|---|
| n8n account | Free Starter tier on n8n.io/cloud — the MCP Server Trigger is available on all tiers |
| Node.js | v18 or later, installed on the machine running Claude Desktop — needed for npx mcp-remote |
| Claude Desktop | Latest version from claude.ai/download |
| Slack workspace | Any workspace where you can install apps — needed for Tool 2 only |
| Time | ~45 minutes |
Self-hosted n8n users: MCP Server Trigger works on self-hosted instances too, but your n8n instance must be reachable via a public HTTPS URL. If you run behind a reverse proxy (nginx, Caddy, Traefik), add
proxy_buffering offand disable gzip on the/mcp/path — otherwise the SSE stream gets buffered and Claude hangs waiting for a response.
MCP in 2 Minutes
Model Context Protocol (MCP) is an open standard1 that lets AI assistants (Claude, GPT, Gemini, Cursor) call external tools over a defined protocol. Think of it as a USB standard for AI tool integrations: one protocol, any client, any server.
Before MCP, connecting Claude to your tools meant custom plugins, brittle API wrappers, or provider-specific function-calling schemas. MCP standardises the interface so that a tool built once can be used by any MCP-compatible client.
Where n8n fits:
| Role | What it means |
|---|---|
| MCP Server | n8n exposes your workflows as callable tools via an HTTPS endpoint |
| MCP Client | Claude Desktop (or Cursor, VS Code, etc.) discovers and calls those tools |
| Transport | n8n uses Streamable HTTP (with SSE fallback). Claude Desktop bridges to this via mcp-remote |
The key insight: every n8n workflow becomes a natural-language-addressable action. You don't write a single line of integration code — n8n handles authentication, retries, and data transformation; MCP handles the protocol.
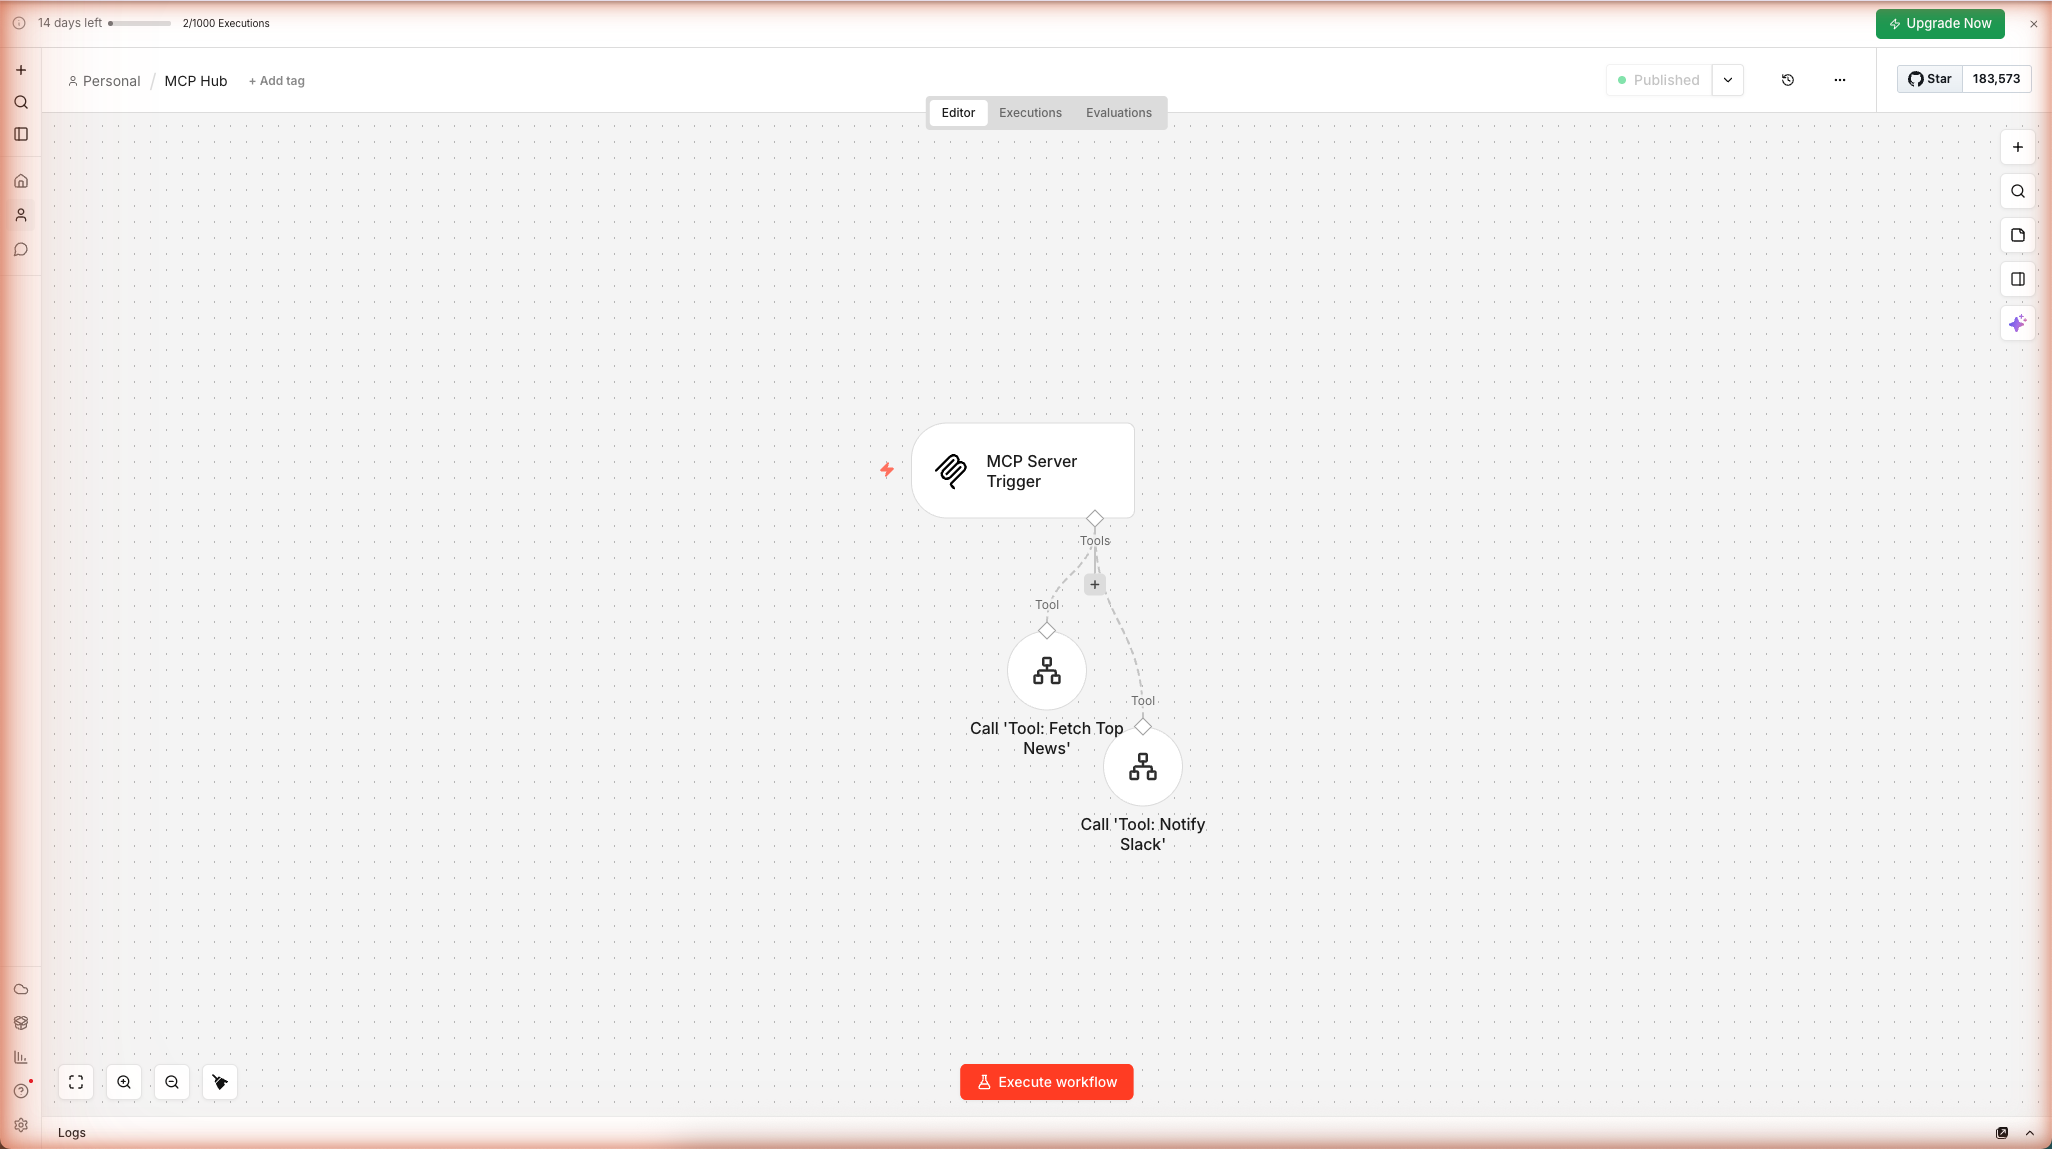
Step 1 — Create the MCP Server Trigger Workflow
This is the hub workflow — it runs persistently and advertises your tools to any connected MCP client. It contains no logic itself; it just holds the MCP Server Trigger node and routes incoming tool calls to sub-workflows.
1.1 — Open n8n and Create a New Workflow
Log in to your n8n Cloud instance. Click + New workflow in the top-left corner.
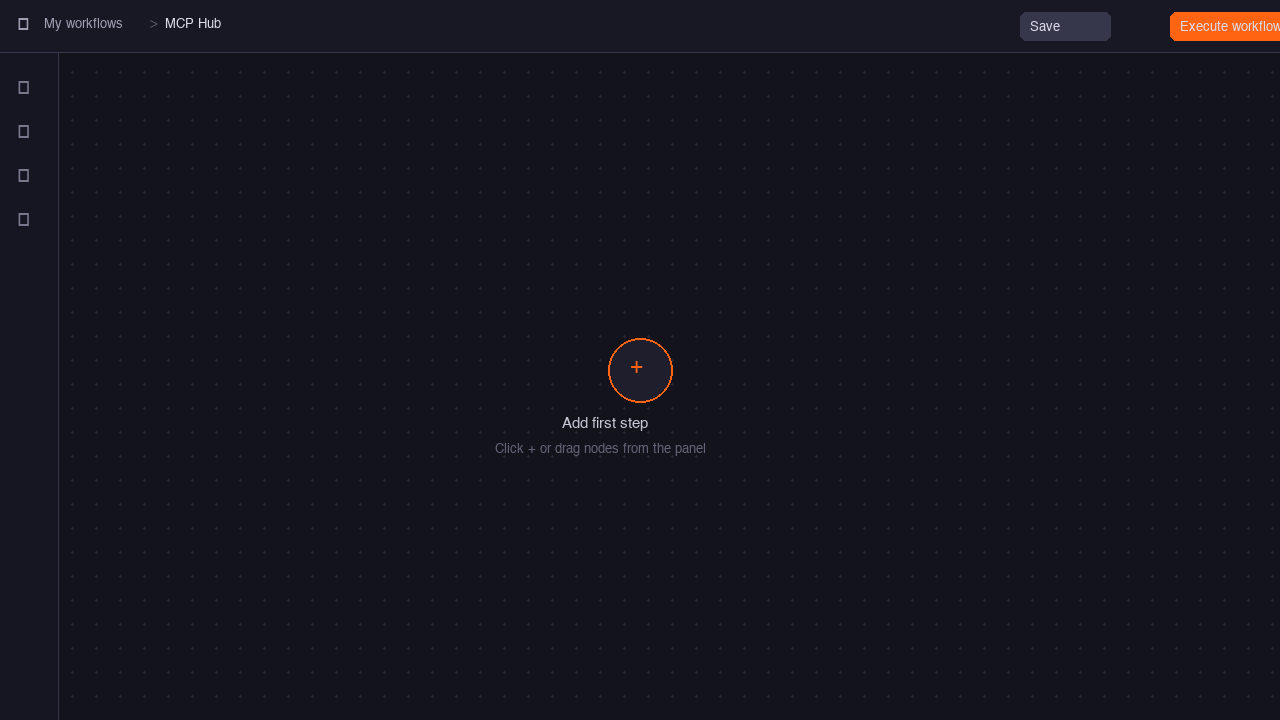
Rename the workflow to something memorable — click the workflow name at the top and type MCP Hub.
1.2 — Add the MCP Server Trigger Node
Press N to open the node browser. Search for MCP Server Trigger and click it to add it to the canvas.
1.3 — Configure the Trigger
Click the MCP Server Trigger node to open its panel. You'll see three key fields:
| Field | What to set | Why |
|---|---|---|
| Authentication | Bearer Auth (recommended) | Prevents anyone with your URL from calling your tools |
| Credential | Create new → set a strong token string | This is the Bearer token you'll put in Claude Desktop config |
| Path | Leave as-is (n8n generates a UUID) | This becomes part of your production MCP URL |
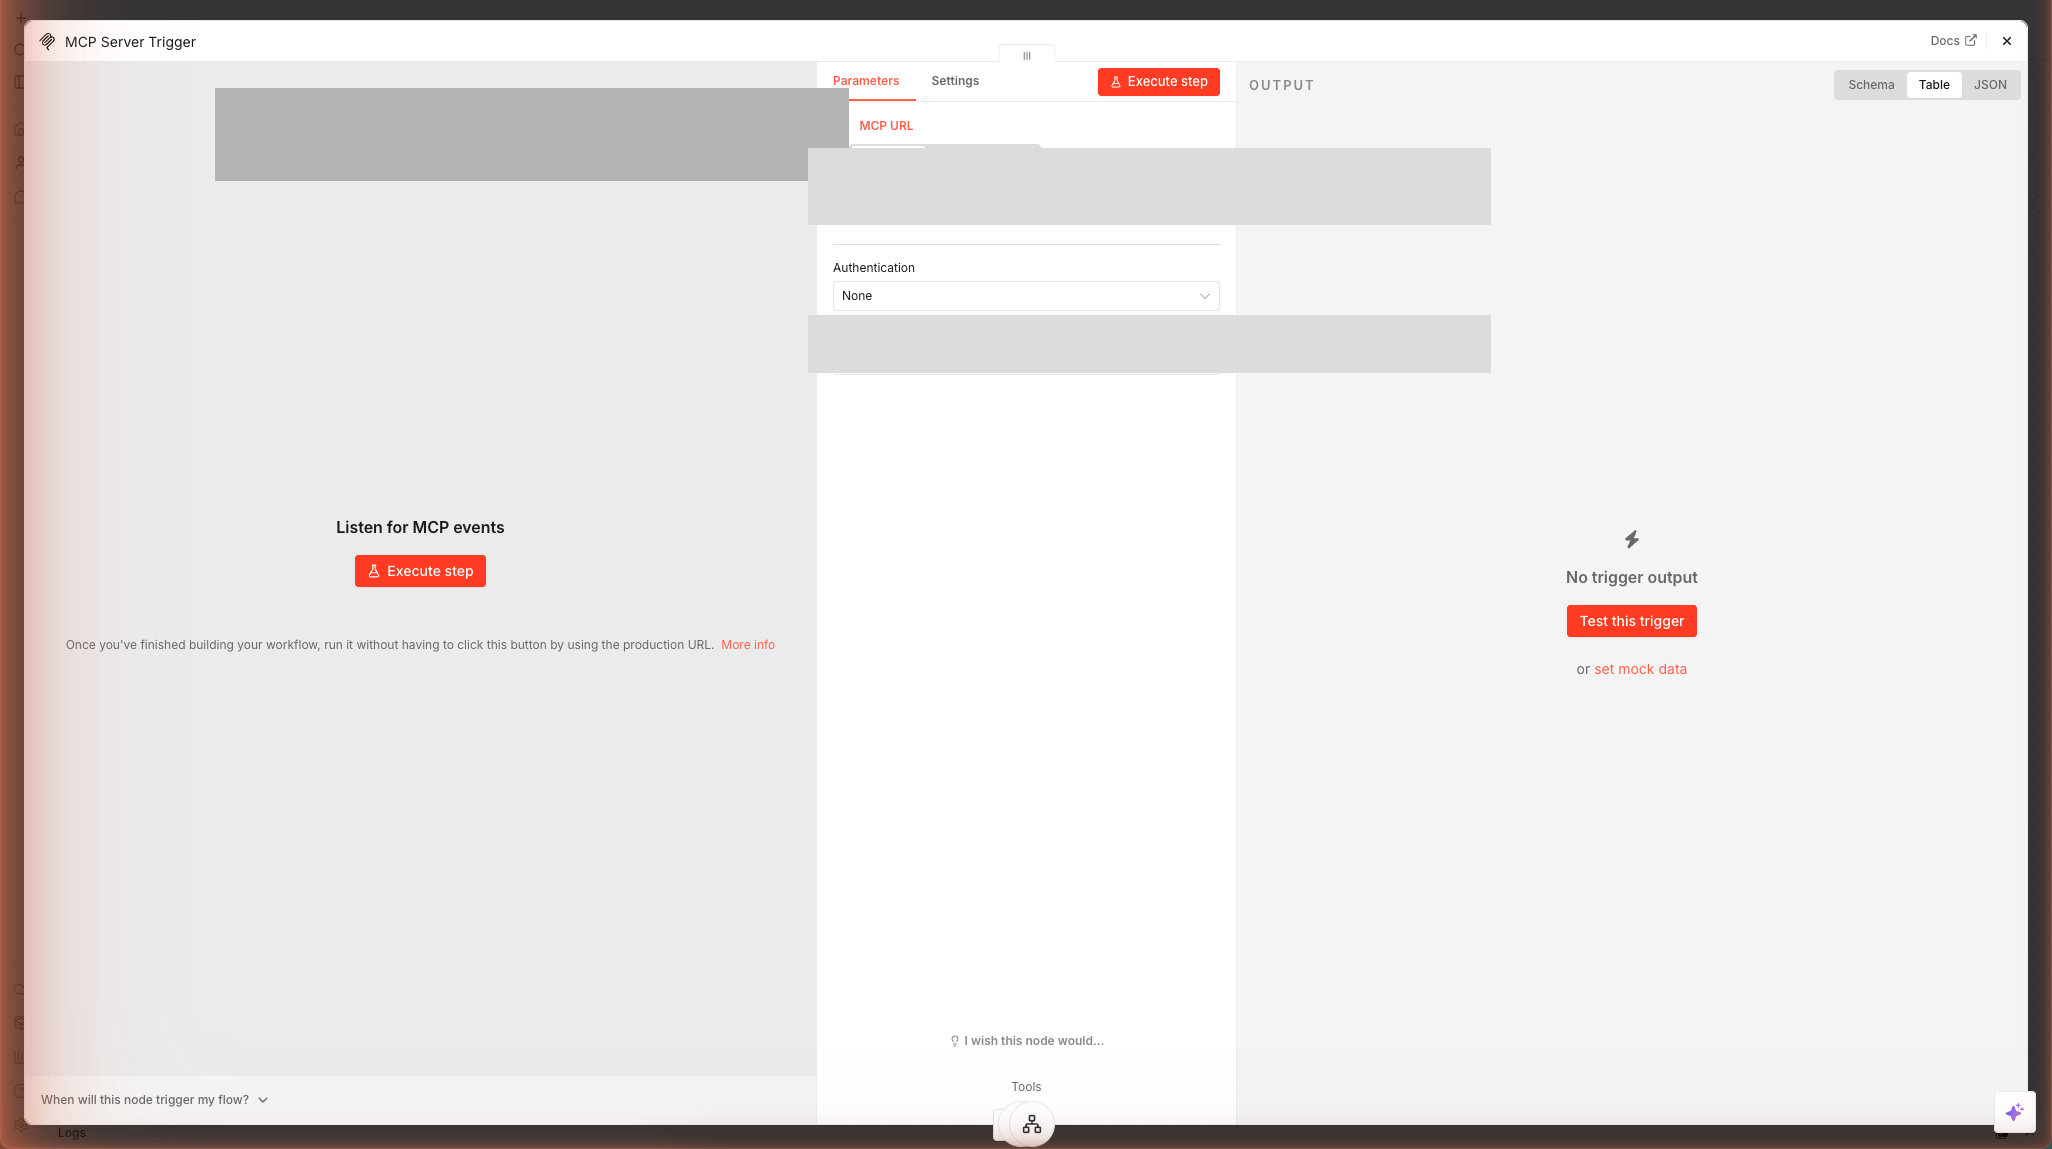
Save the Bearer token now. You will need it in Step 4 when configuring Claude Desktop. Store it in a password manager — n8n will not show it again after you close the credential dialog.
After saving, the node shows two URLs at the bottom of the panel:
- Test URL —
https://<subdomain>.app.n8n.cloud/mcp-test/<path>— only active when you manually trigger the workflow - Production URL —
https://<subdomain>.app.n8n.cloud/mcp/<path>— active once the workflow is Activated (the toggle at top right)
Copy the Production URL — you'll need it in Step 4.

1.4 — Activate the Workflow
Before you can add tools, activate the workflow so the Production URL becomes live. Click the Inactive toggle in the top-right corner — it turns blue and shows Active.
Step 2 — Add a News Fetcher Tool (No Credentials)
The first tool fetches the top 5 Hacker News front-page stories using the free Algolia HN API. It requires no credentials and works immediately.
2.1 — Create the News Fetcher Sub-Workflow
Open a second browser tab and create a new n8n workflow. Name it Tool: Fetch Top News.
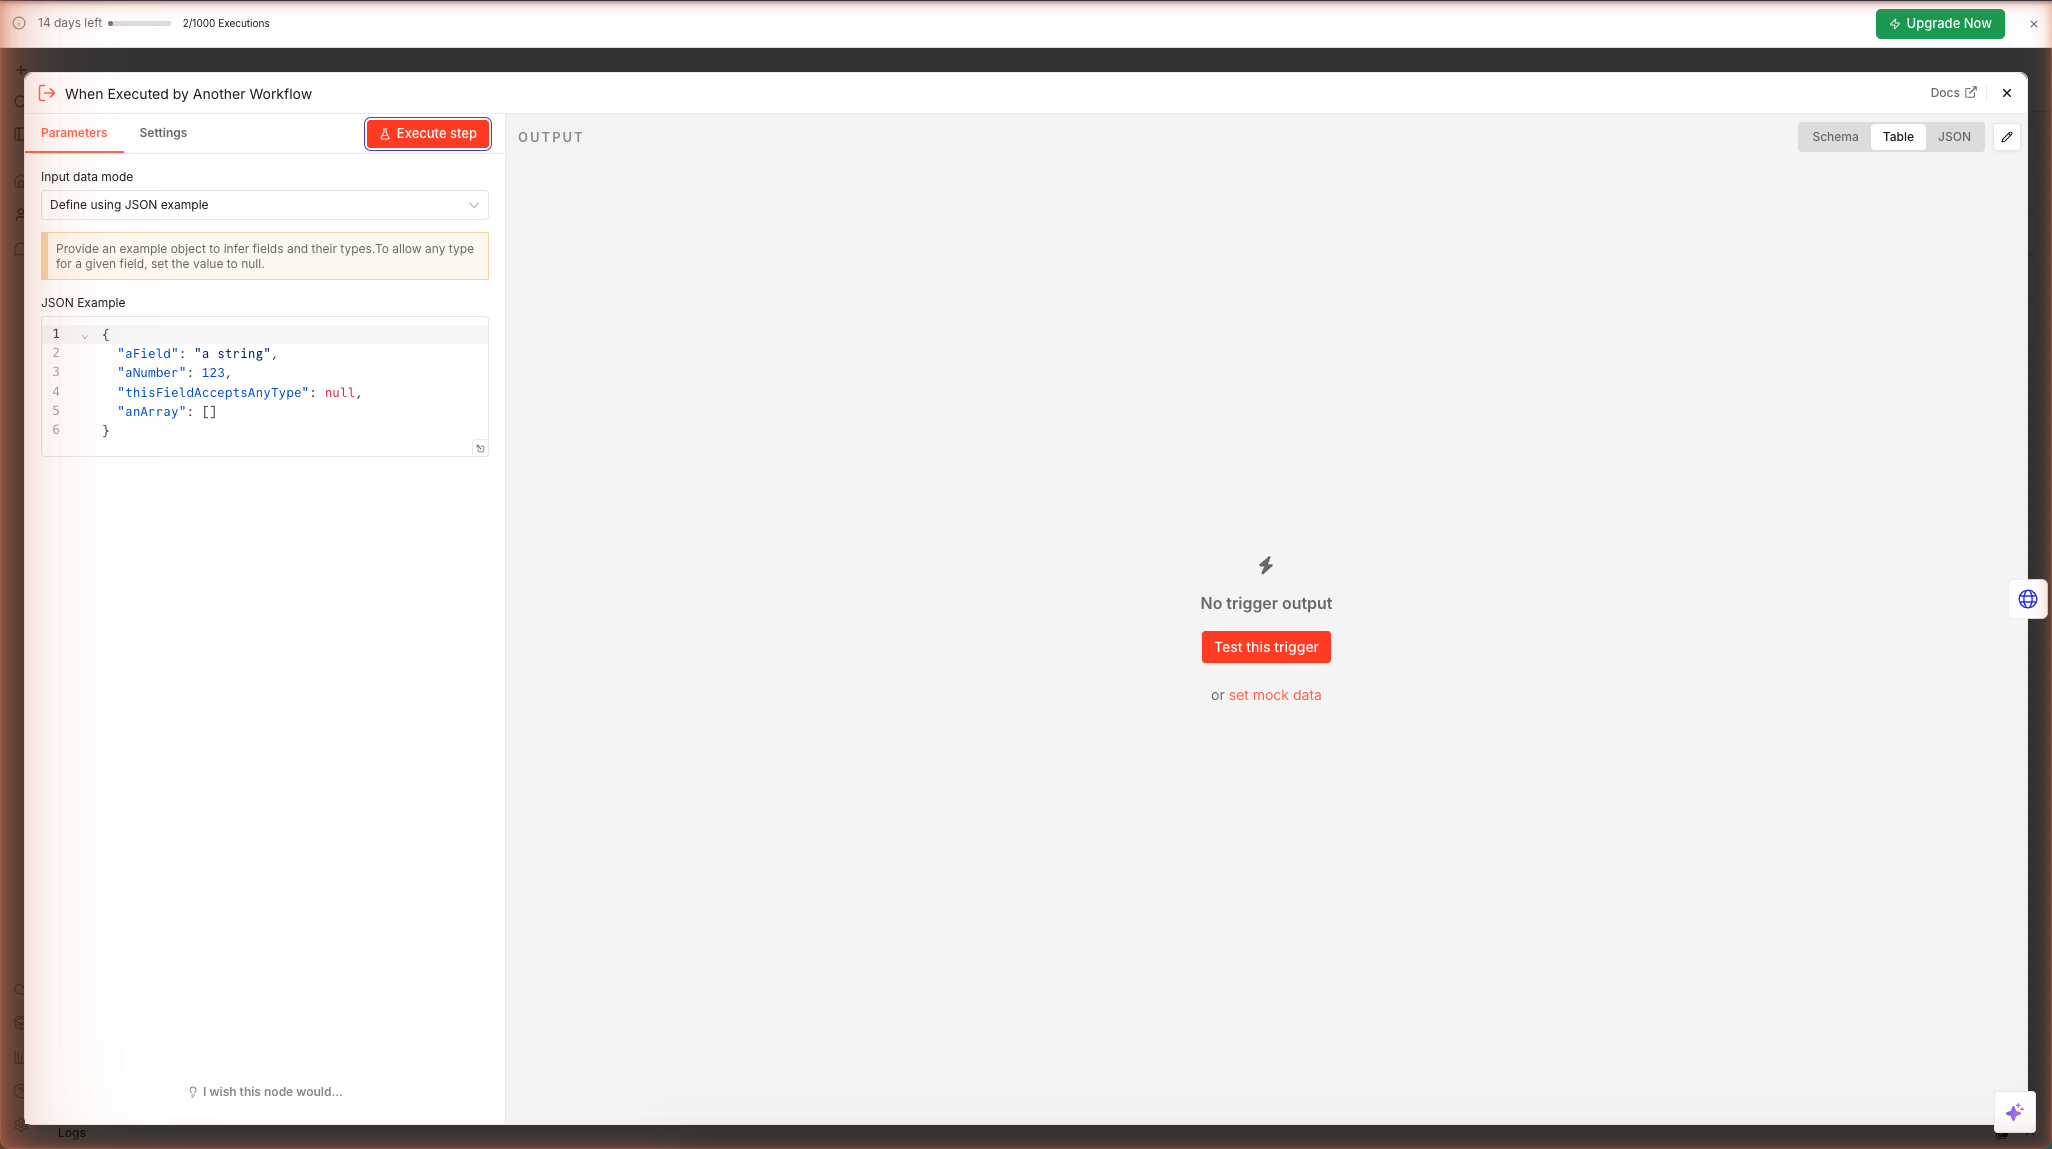
This sub-workflow will be called by the MCP hub whenever Claude invokes the fetch_top_news tool. It needs a When Executed by Another Workflow trigger:
Press N, search for When Executed by Another Workflow, and add it. In the node panel, set:
- Respond →
Using Respond to Webhook node
2.2 — Add the HTTP Request Node
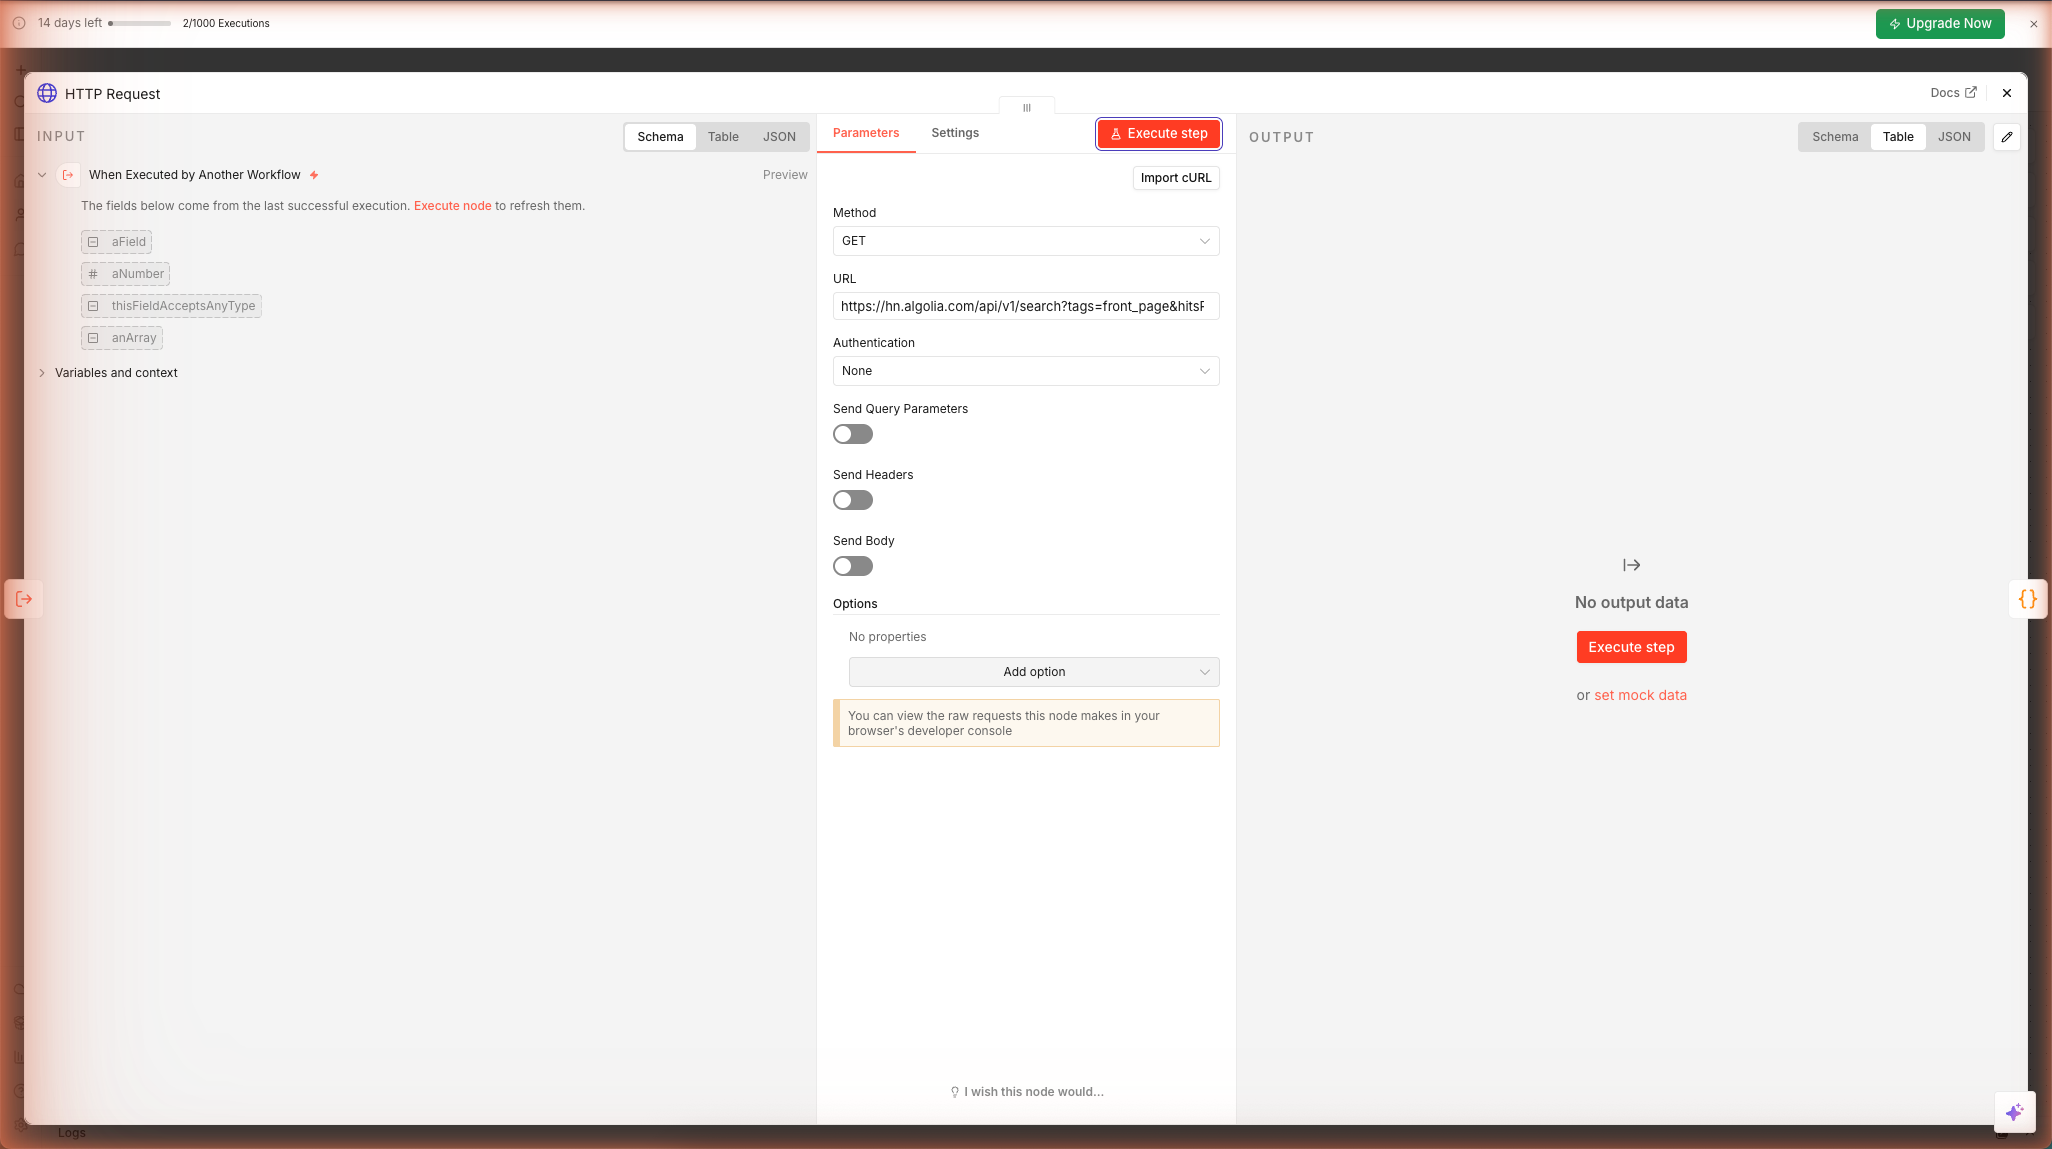
Press N, add an HTTP Request node, and wire it to the trigger. Configure:
| Field | Value |
|---|---|
| Method | GET |
| URL | https://hn.algolia.com/api/v1/search?tags=front_page&hitsPerPage=5 |
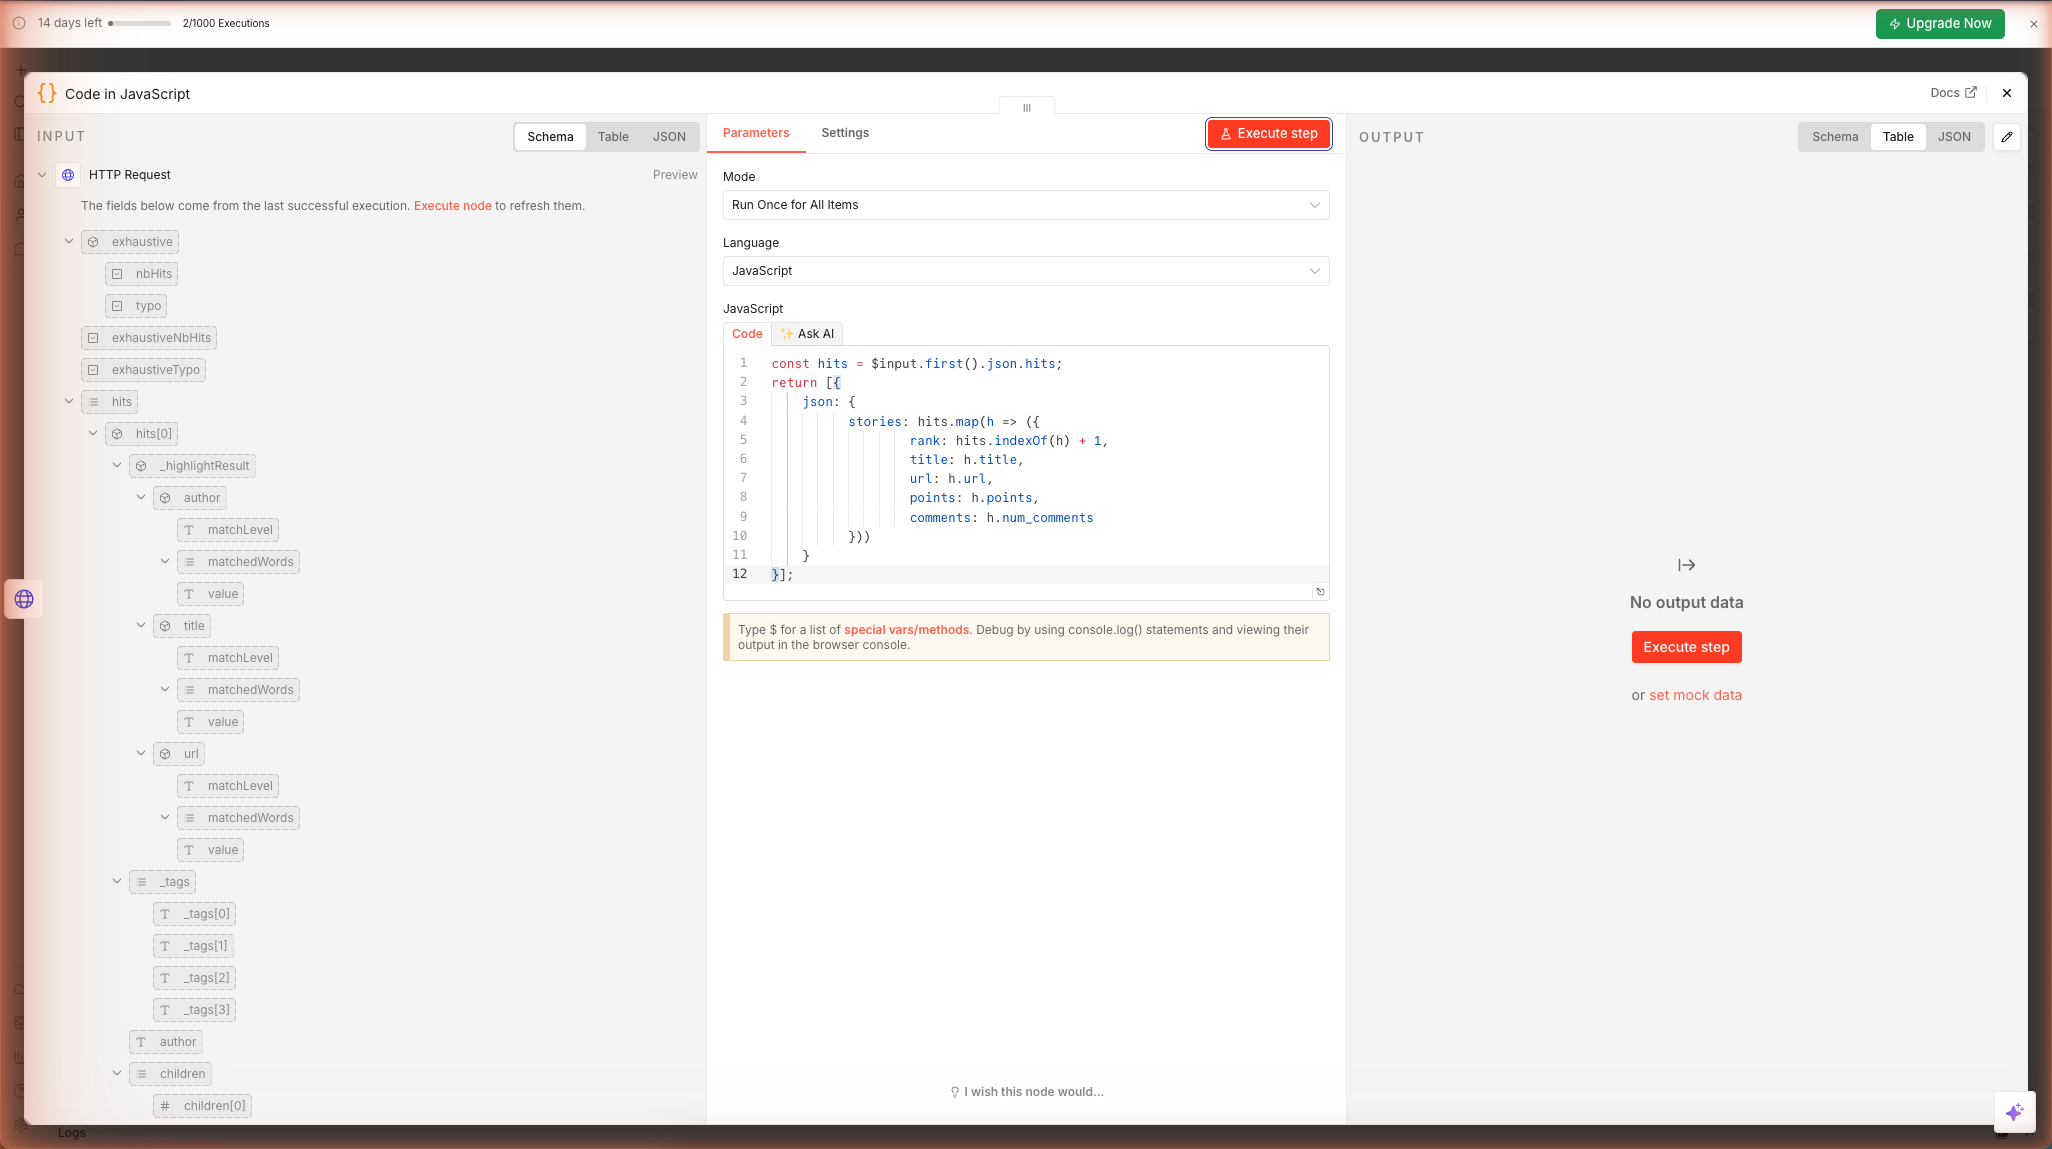
2.3 — Add a Code Node to Shape the Output
The raw API response includes dozens of fields. Add a Code node after HTTP Request to return only what Claude needs:
const hits = $input.first().json.hits;
return [{
  json: {
    stories: hits.map(h => ({
      rank: hits.indexOf(h) + 1,
      title: h.title,
      url: h.url,
      points: h.points,
      comments: h.num_comments
    }))
  }
}];
2.4 — Add a Respond to Webhook Node
Add a Respond to Webhook node at the end of the chain. Set:
- Respond With →
All Incoming Items
This sends the shaped output back to the MCP hub as the tool result that Claude will read.
Activate this workflow (toggle at top right).
2.5 — Wire the Tool into the MCP Hub
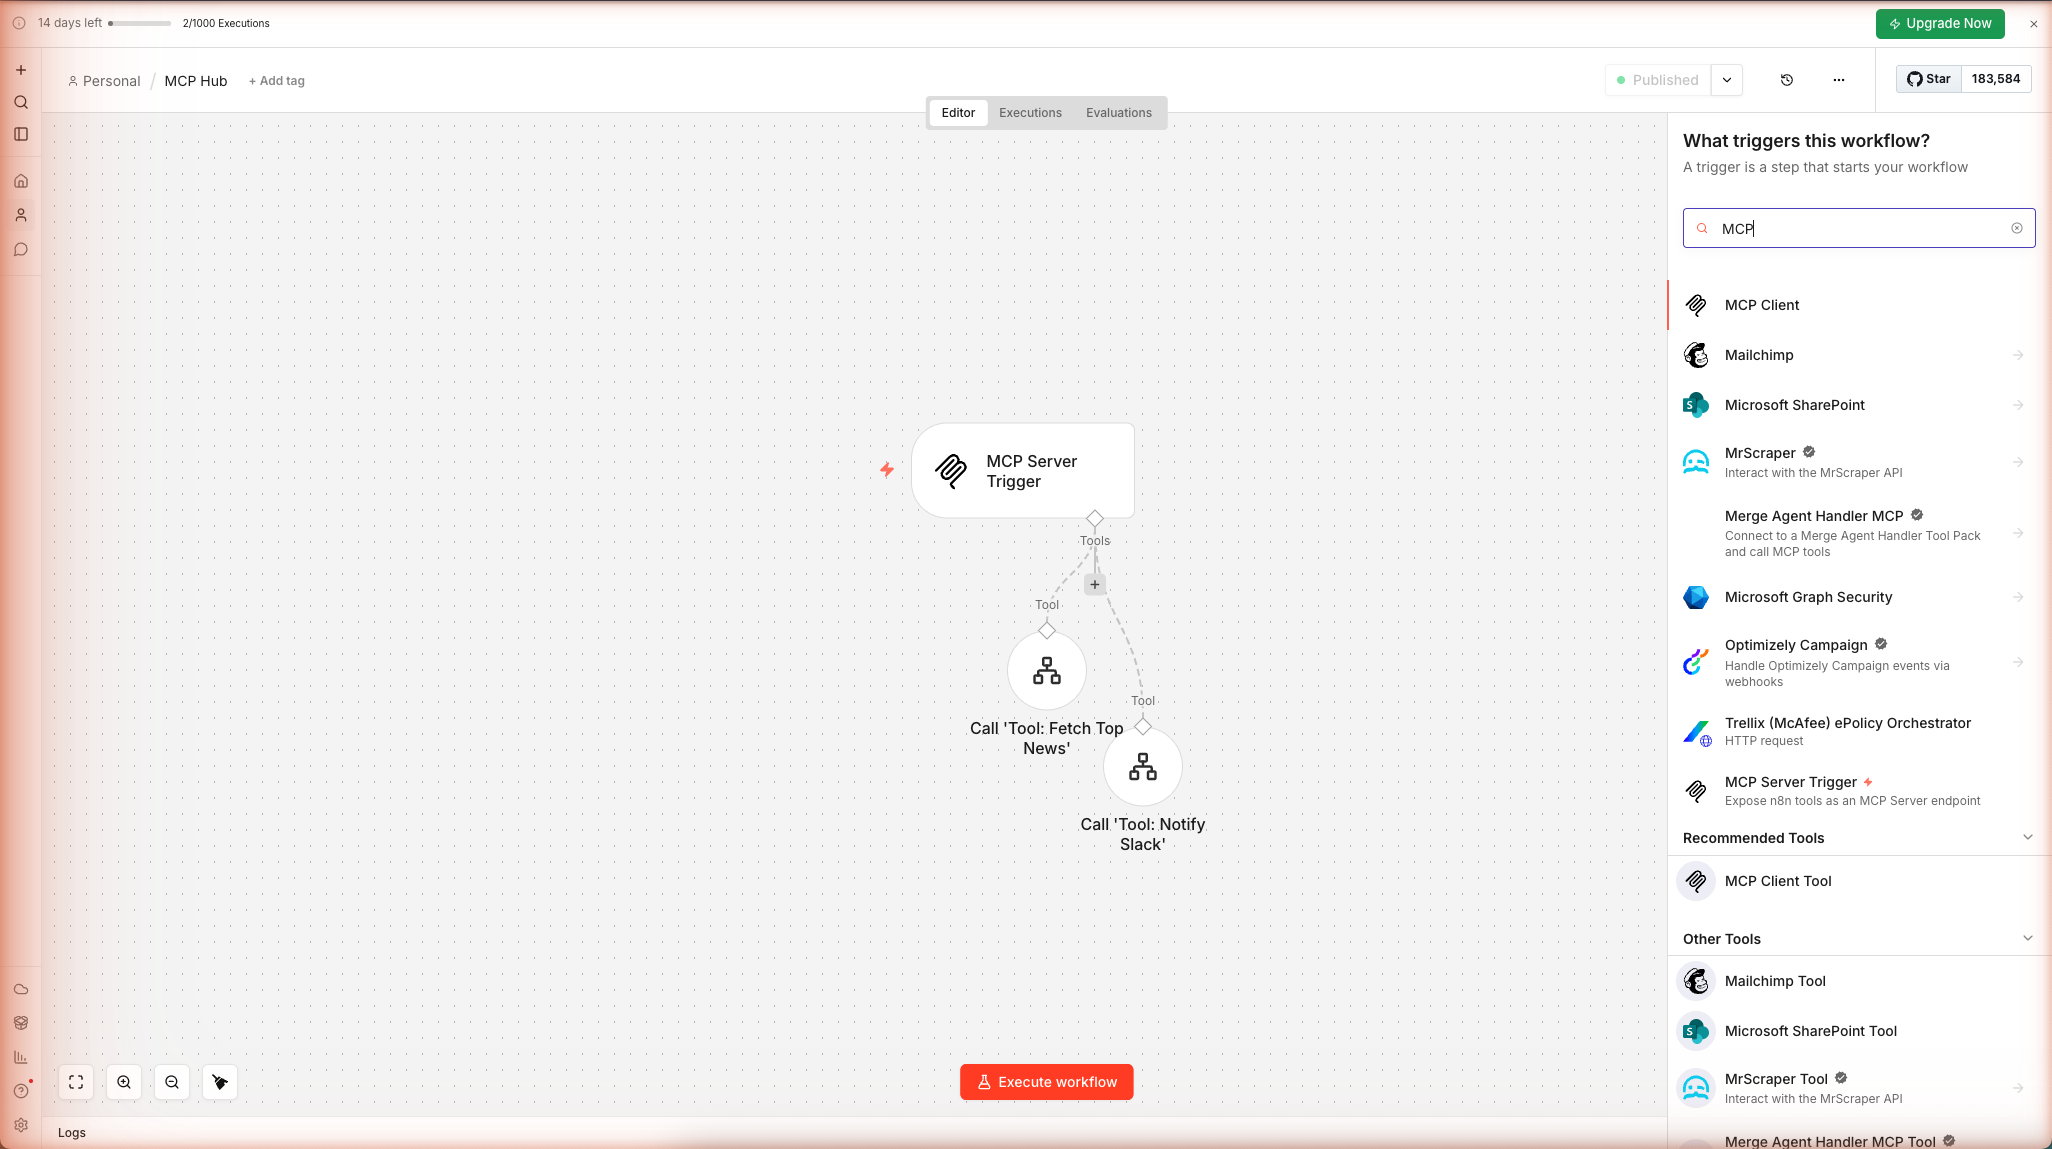
Switch back to the MCP Hub workflow tab. Click the MCP Server Trigger node. On the left side of the node, you'll see a Tools input port — click the + icon there.
Search for Call n8n Workflow and add it as a sub-node. Configure:
| Field | Value |
|---|---|
| Workflow | Select Tool: Fetch Top News from the dropdown |
| Tool Name | fetch_top_news |
| Tool Description | Fetches the current top 5 Hacker News front-page stories with title, URL, points, and comment count. |
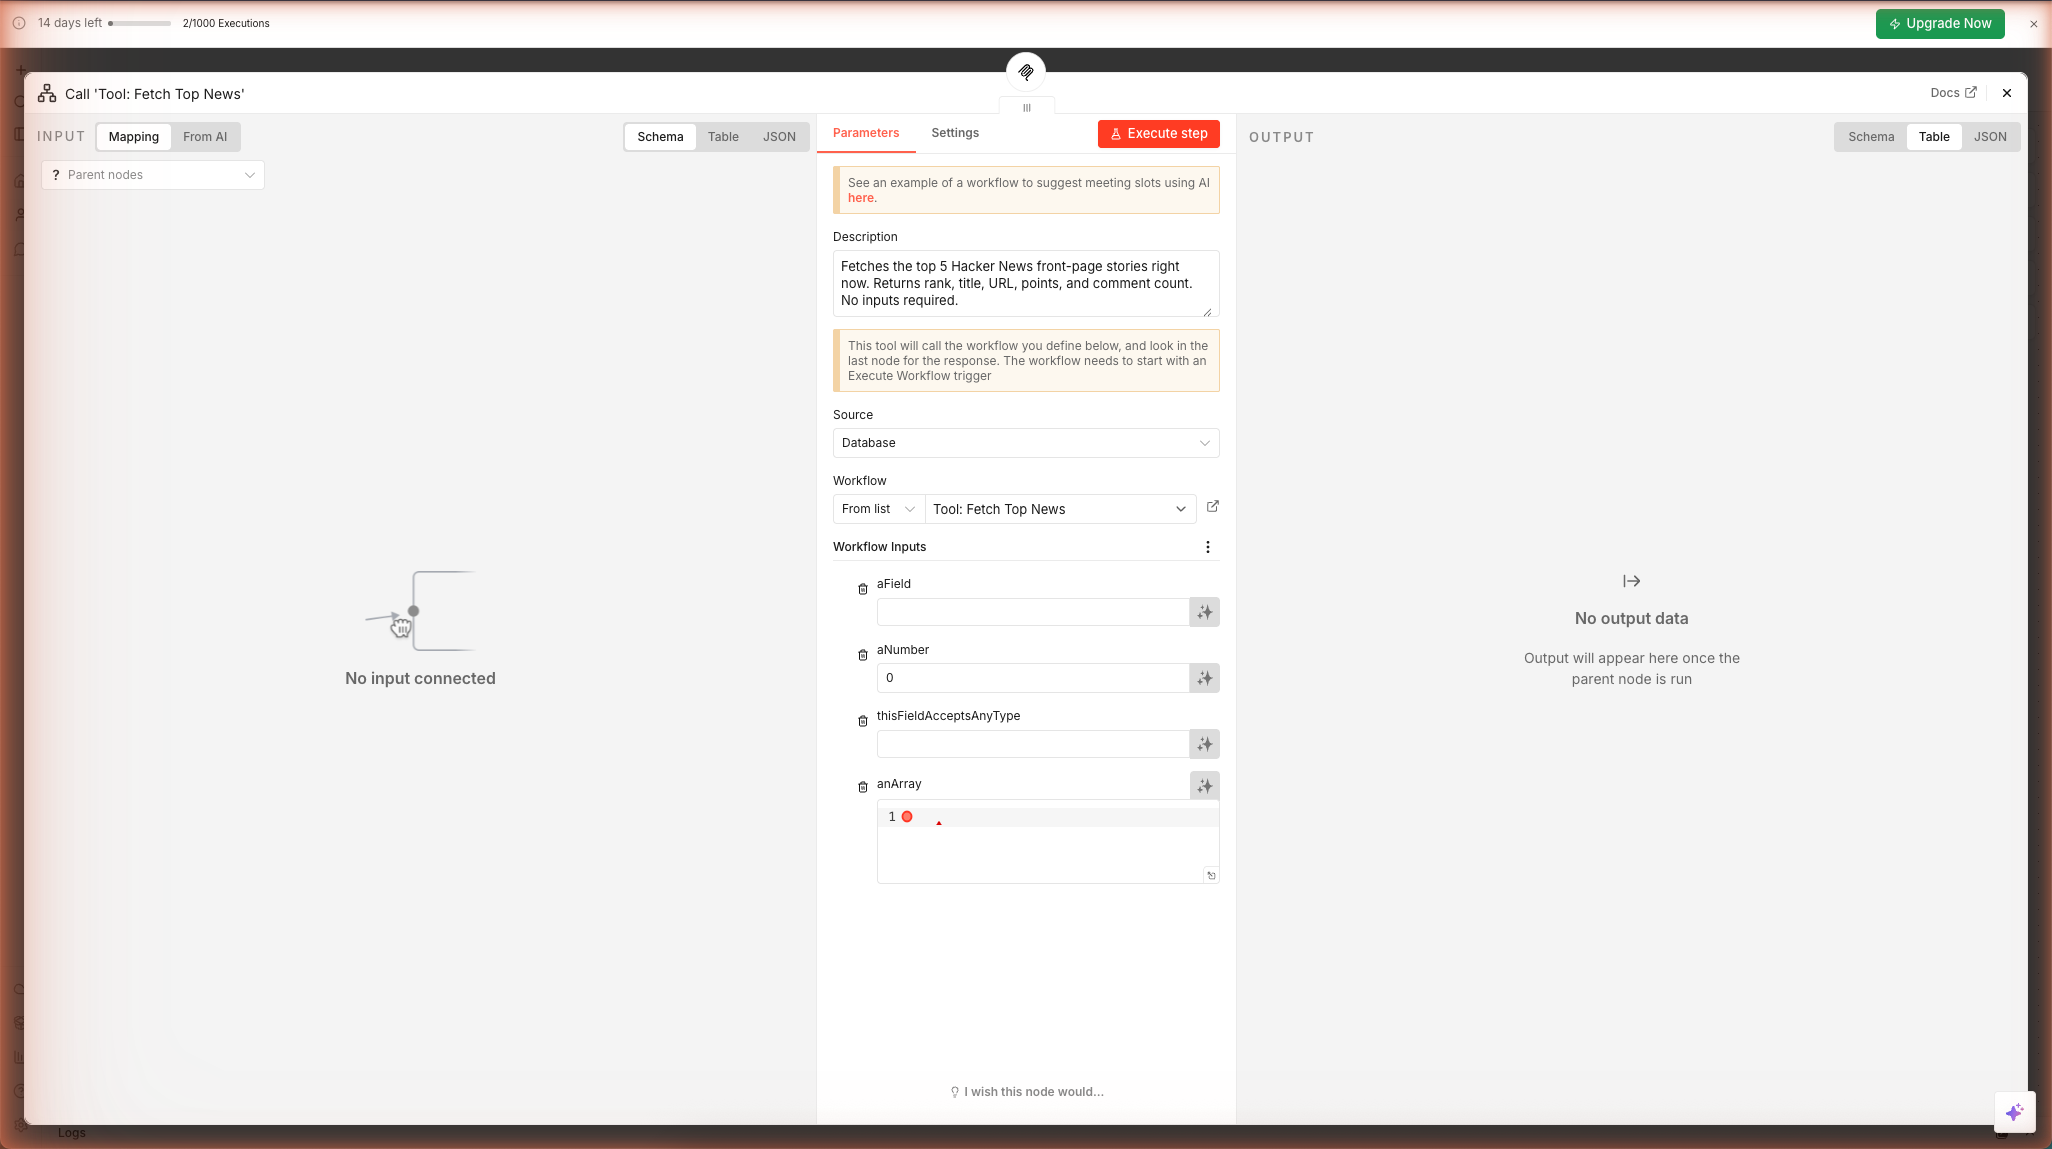
The tool description is what the AI reads. Write it in plain English as if you're telling a colleague what this tool does and when to use it. Claude uses this description to decide whether to invoke the tool in response to a user request.
Step 3 — Add a Slack Notifier Tool
The second tool sends a message to a Slack channel. This requires a Slack credential — the steps below take about 15 minutes if you haven't set one up in n8n before.
3.1 — Create a Slack App and Get a Bot Token
- Go to api.slack.com/apps → Create New App → From scratch
- Name:
n8n MCP Bot| Workspace: your workspace → Create App - In the left sidebar → OAuth & Permissions → under Bot Token Scopes add:
chat:write - Scroll up → Install to Workspace → Allow
- Copy the Bot User OAuth Token (
xoxb-...)
In n8n, go to Settings → Credentials → + Add credential → Slack OAuth2 API and paste the token.
3.2 — Create the Slack Notifier Sub-Workflow
Create a new workflow named Tool: Send Slack Message.
Add a When Executed by Another Workflow trigger (same as Step 2.1) with Respond set to Using Respond to Webhook node.
3.3 — Add the Slack Node
Press N, add a Slack node, wire it to the trigger. Configure:
| Field | Value |
|---|---|
| Credential | Your Slack credential |
| Resource | Message |
| Operation | Send |
| Channel | #general (or any channel the bot was invited to — /invite @n8n MCP Bot) |
| Message Text | {{ $json.message }} |
The {{ $json.message }} expression reads the message parameter that Claude will pass when calling this tool. Claude will decide what text to send based on context.
3.4 — Add Respond to Webhook
Add a Respond to Webhook node → set Respond With → First Incoming Item's JSON. Wire it after the Slack node. Activate this workflow.
3.5 — Wire the Slack Tool into the MCP Hub
Back in the MCP Hub workflow, add another Call n8n Workflow sub-node to the MCP Server Trigger's Tools port. Configure:
| Field | Value |
|---|---|
| Workflow | Tool: Send Slack Message |
| Tool Name | send_slack_message |
| Tool Description | Sends a message to the #general Slack channel. Use this to notify the team or post a summary. Accepts a 'message' parameter with the text to send. |
Your MCP hub now advertises two tools. Any MCP client that connects will see fetch_top_news and send_slack_message in its tool list.
Step 4 — Activate All Three Workflows
Before any MCP client can call your tools, all three workflows must be active. n8n only routes incoming MCP calls to active workflows — inactive workflows silently reject execution requests.
4.1 — Activate the Sub-Workflows First
Open Tool: Fetch Top News in a new browser tab. Click Publish in the top-right corner. The button changes to Published and a green indicator confirms the workflow is live.
Repeat for Tool: Notify Slack.
Why sub-workflows first? The MCP Hub's Call n8n Workflow Tool nodes call the sub-workflows by ID. If the sub-workflows are inactive when the hub receives a tool call, n8n returns a "Workflow is not active" error. Activating them before the hub avoids this race condition.
4.2 — Activate the MCP Hub
Return to the MCP Hub workflow. Click Publish. The header now shows Published and the execution counter becomes active.
What the Production URL is for: Once published, the MCP Server Trigger exposes a permanent Production URL at
https://<subdomain>.app.n8n.cloud/mcp/<uuid>. Any MCP-compatible client — Claude Desktop, Cursor, or a custom agent — can point to this URL to discover and call your tools over SSE.
Step 5 — Verify the Tools Work in n8n
You don't need an external MCP client to confirm everything is wired correctly. The n8n Executions tab records every tool call with full input/output data.
5.1 — Trigger a Test Call
Open the MCP Server Trigger node panel and copy the Test URL. Paste it into any MCP client or use curl to send a tool-list request. Alternatively, if you have Claude Desktop configured with the Production URL, send any message that would invoke fetch_top_news.
Each tool call creates one execution entry in the MCP Hub and one in the sub-workflow it called.
5.2 — Inspect the Execution in n8n
Click the Executions tab in the workflow header. Each row shows the timestamp, status, duration, and execution ID. A green Succeeded badge confirms the full call chain ran cleanly — from the MCP Server Trigger through to the sub-workflow's Respond to Webhook node.
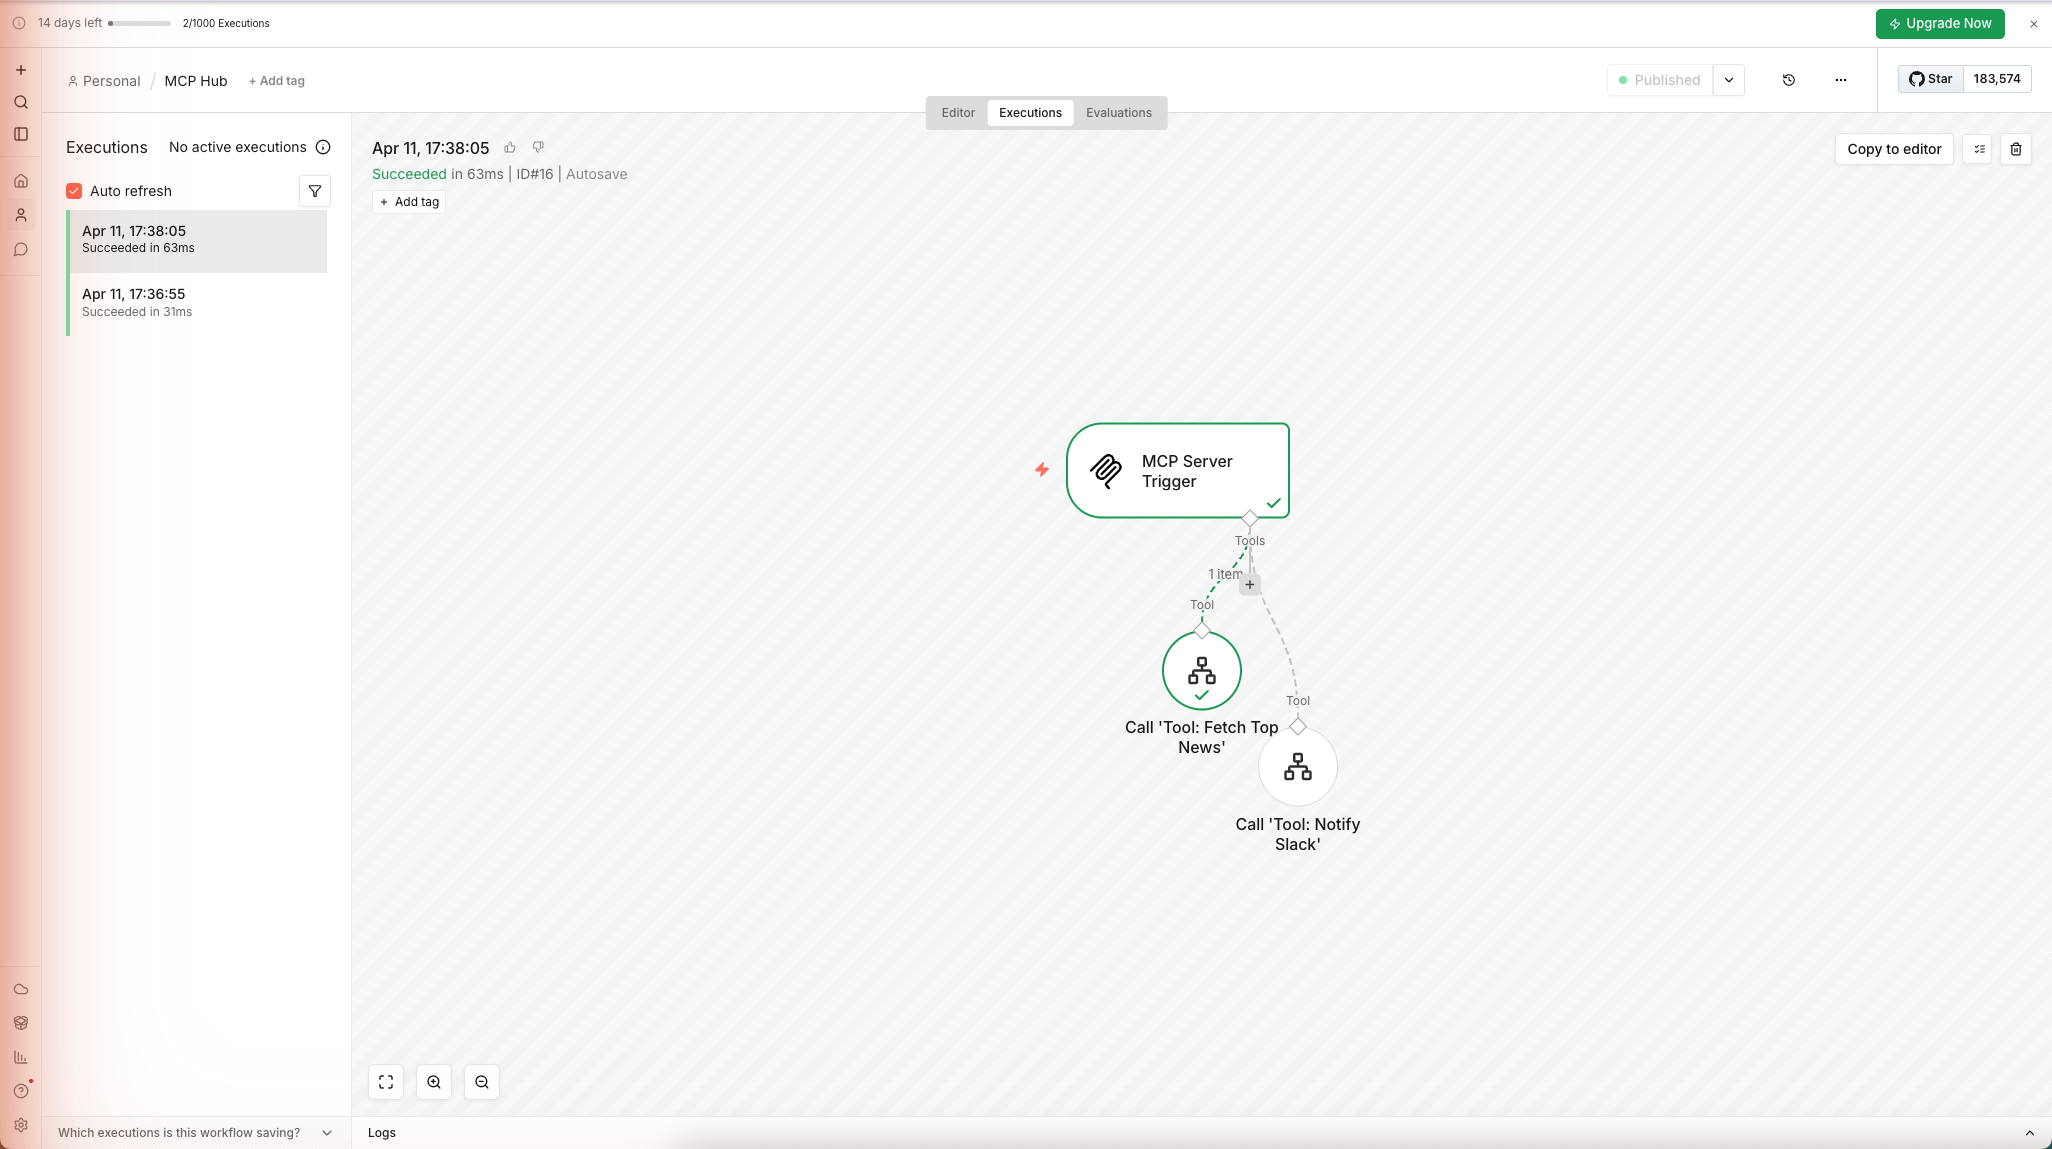
Click any row to open the execution detail. The canvas highlights every node that ran in green. Click a node to expand its input and output panels — for the Call 'Tool: Fetch Top News' node you'll see the 5-story JSON array the sub-workflow returned.
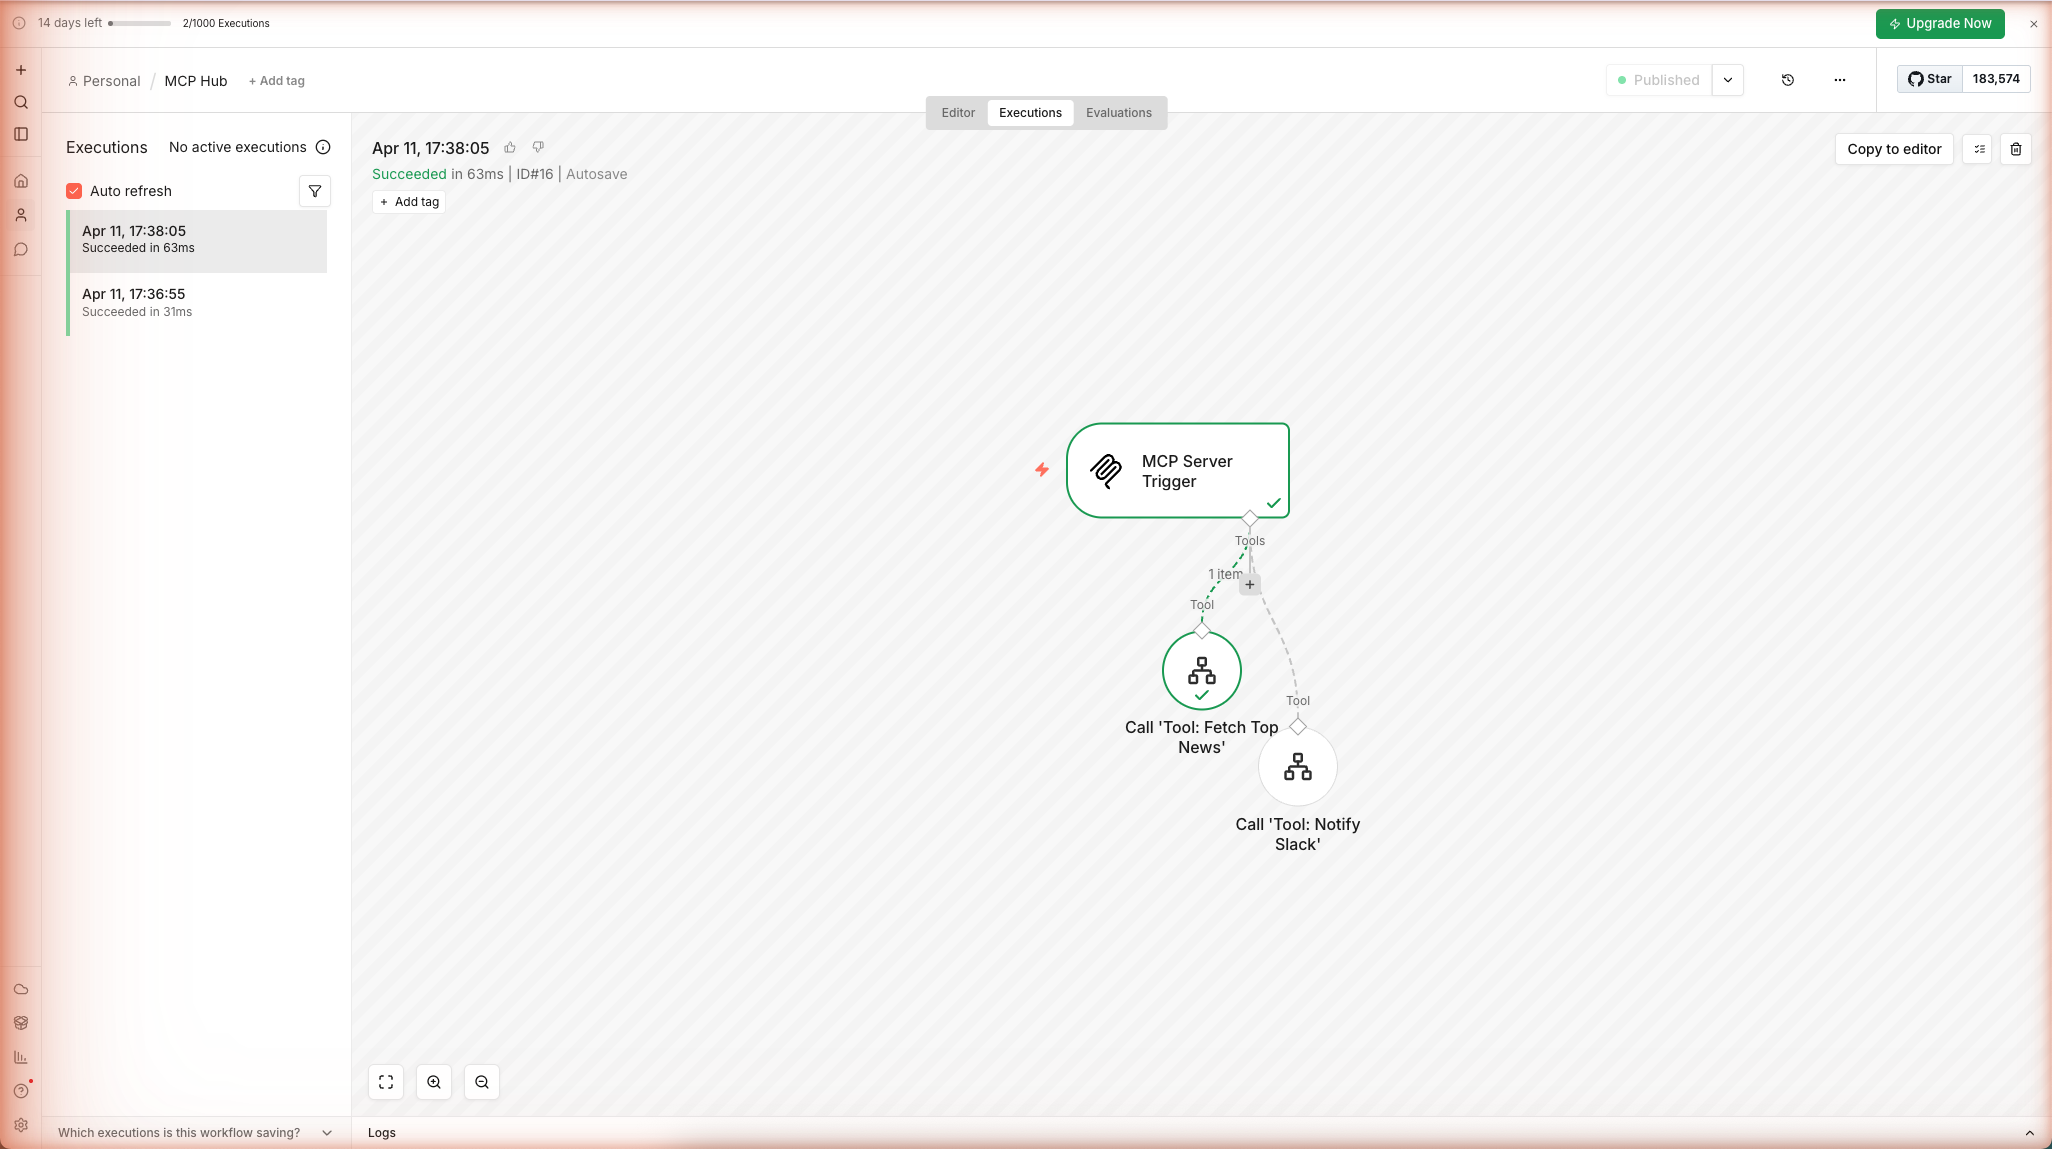
Checking sub-workflow executions: The Tool: Fetch Top News workflow has its own Executions tab. Each time the hub calls it, a new entry appears there too — useful for debugging the HTTP Request or Code node output independently of the hub.
Going Further — The MCP Tool Pattern
Every tool follows the same 3-step pattern you've now used twice:
- Sub-workflow — a standalone n8n workflow that does one thing and returns a result via Respond to Webhook
- Call n8n Workflow node — attached to the MCP Server Trigger's Tools port, with a clear
toolNameanddescription - Claude knows when to call it — from the description alone
Some tools worth adding next:
| Tool name | Sub-workflow nodes | What Claude can do with it |
|---|---|---|
search_web | HTTP Request → Tavily API | Research any topic without leaving Claude |
create_notion_page | Notion node | "Turn this conversation into a Notion doc" |
get_calendar_events | Google Calendar node | "What do I have tomorrow?" |
query_database | Postgres / MySQL node | "How many signups this week?" |
run_github_action | HTTP Request → GitHub API | "Deploy the staging branch" |
send_email | Gmail / SMTP node | "Send a follow-up to everyone who replied this week" |
Using External MCP Servers as Tools Inside n8n
The reverse also works: n8n can consume external MCP servers as tools for its own AI Agent nodes. Add an MCP Client Tool sub-node to any AI Agent node's Tools port, paste the external MCP server's SSE or Streamable HTTP URL, and the agent gains access to all that server's tools.
This lets you chain services: Claude Desktop → n8n MCP hub → n8n AI Agent → external MCP server (e.g., Notion's official MCP, a filesystem MCP, a browser control MCP).
Self-Hosted Reverse Proxy Config
If your n8n runs behind nginx, add this to your location block for the MCP path to prevent SSE buffering:
location /mcp/ {
    proxy_pass http://n8n:5678;
    proxy_http_version 1.1;
    proxy_buffering off;
    gzip off;
    chunked_transfer_encoding off;
    proxy_set_header Connection '';
    proxy_set_header Host $host;
    proxy_set_header X-Real-IP $remote_addr;
}
Troubleshooting
| Symptom | Likely cause | Fix |
|---|---|---|
| Tools don't appear in Claude | Config file syntax error | Run cat ~/Library/Application\ Support/Claude/claude_desktop_config.json | python3 -m json.tool to validate JSON |
npx mcp-remote not found | Node.js not installed | Install Node.js v18+ from nodejs.org |
| Claude says "Tool call failed" | Workflow not activated | Toggle the MCP Hub workflow and all sub-workflows to Active |
| SSE stream hangs (self-hosted) | Reverse proxy buffering | Add proxy_buffering off to your nginx config |
| Bearer token rejected | Token mismatch | Re-copy the token from the n8n credential; tokens are case-sensitive |
| Tool list is empty after restart | n8n URL wrong | Confirm you are using the Production URL (path /mcp/) not the Test URL (path /mcp-test/) |
Footnotes
-
MCP was introduced by Anthropic in November 2024 and is now supported by OpenAI, Google DeepMind, and dozens of other AI providers. Spec: modelcontextprotocol.io ↩